How to install an android application on windows. How to run an Android application on a Windows computer. So what to choose
All you need for this is to download and install it for yourself free program and make a few settings. As a result, you will receive a virtual Android phone which runs on your computer.
To obtain virtual phone Android, you will have to install and learn how to use the Android Software Development Kit (SDK), which developers work with when creating their programs and utilities for Android OS. Using the SDK may sound intimidating, but by knowing a few basics and following the instructions in this whitepaper, you'll find that it's quite easy to use.
But first, a few caveats. Firstly (and probably most importantly), you won't be able to use your virtual Android phone to make real calls. The project is focused only on providing the feel of Android OS, its user interface, and the ability to try some of its applications without purchasing anything.
Another limitation is that any application that works with the phone's camera or its GPS module, will discover that these components are in fact missing. Also, any app that uses location services (which provide sensitive information based on your phone's physical location) will not be able to figure out where you are (although an Android virtual device can be made to work with a connected camera or GPS, but that level of trickery is beyond the scope of this story) . You will also find that your virtual device is slow - perhaps much slower than in real world phones with Android.
But there are still a lot of things that the Android virtual device can do - especially when starting to install applications (though, of course, even this causes some headaches, as we'll describe below). If you can tolerate the above limitations, then keep reading and you will learn how you can have a working Android virtual device on your Windows PC in just a few minutes.
A few words about Android applications
There are a few things you need to remember about Android apps. Unlike a highly demanding store iPhone applications App Store, its version for Android OS is called Android Market– provides much greater freedom. In fact, some consider the Android Market to be the wild west of applications: almost everything is allowed there, and dangerous (malicious) applications are often removed from it only after user complaints. As for the prevalence malware on the Android Market, then recently SMobile Systems, a company dealing with security issues for programs on mobile phones– stated in its report that approximately “one in five programs requests permission to access private or important information, which the attacker can use for his own purposes.”
It is unlikely that each of these applications requests this information in order to send it to cybercriminals. Apparently, most of these applications either use this information for legitimate purposes (for example, for Internet banking) or simply ask for it due to the weakness of the developer as a coder. But at least some of these apps may still be trying to steal your information from you and put it in the hands of people you don't want to give it to.
However, the Android Market is not the only place to download and install Android applications. There have been several independent Android app stores running for some time now (like Softonic, Handango, and GetJar), and new stores are also emerging (like AndSpot, SlideMe, and AndAppStore). But how they will treat hackers remains to be seen.
In general, you should be careful about what you install on Android - even virtual ones - especially if you've already entered any personal information, such as your Google account name/password. How do you know if an application is dangerous? Without installing some kind of security program, this can be difficult. For example, I installed Lookout Mobile Security FREE (beta) on several of my virtual Android devices (and on my Android phone), and so far, in my opinion, it does what it is supposed to do - protect against malware.
Once you start installing applications on your virtual Android device, you will, however, encounter difficulties. By default, any virtual device created with using Android SDK does not have access to the Android Market - Android OS images created using the SDK are quite simple. Therefore, you may be limited in terms of installing applications - you can only install applications that are available in independent Android application stores.
For example, the Lookout Mobile Security FREE version I installed was downloaded from GetJar. By the way, using Android OS 1.6 I was able to access the Android Market on my virtual device, although I will describe how I did it below.
Also below, I'll show you how to create and use an Android virtual device on a Windows computer, and how to download and install Android apps from independent stores. All this is done using the latest version of Android OS: 2.2, which is also known as Froyo (Froyo is short for "frozen yogurt" - frozen yogurt, because all Android OS code names come from desserts). Then I will show you how to create a virtual device with Android 1.6 and Android Market. But first…
Installing the Android SDK
All instructions presented here were performed on a system with Windows 7 But they should also work for other 32-bit Windows versions XP or 32 or 64 bit versions Windows Vista. Moreover, there are versions of the Android SDK that work on Mac OS X 10.5.8 (and later) and even some Linux versions. True, you will not find descriptions of installing the package for these operating systems here.
The first thing you need to do is make sure you have Java installed. The official Java website can help with this, which will tell you whether Java is installed or not. If Java is not installed or too old version, just follow the instructions on the site and you will get yourself latest version Java. The Android SDK documentation assumes that you install the JDK version of Java, but in reality, as a non-developer, all you need is standard version Java, which is officially called Java SE Runtime Environment. However, when using the Internet Explorer, Java may be called "Java for Windows" Internet Explorer."
After checking that Java is installed, download Android SDK Starter Package, which will be packaged in zip. After unpacking the downloaded archive, you should get the android-sdk-windows folder. You can place it anywhere - everything you need is already there, you don't need to install a program traditional way. Just remember where you put the folder, otherwise you will have a hard time creating icons to launch the application.
Go to the android-sdk-windows folder and run the SDK Setup.exe file, which is the Android SDK and AVD Manager application.

If Java is not installed correctly, you will see an error message pop up.

When you launch the Android SDK and AVD Manager for the first time, you may see a Refresh Sources window, which will inform you that the storage cannot be found.
If you encounter such a message, you will have to change the SDK settings to use HTTP rather than HTTPS. To do this, click Close. Next, you will see a window for selecting packages for installation - “Choose Packages to Install” - in which, however, nothing appears. Click on Cancel. Next you should see the Android SDK and AVD Manager window. Select the settings tab - Settings - and in the Misc section, enable the "Force https://... Sources to be fetched using http://..." option.

Then select the Available Packages tab. You should see a single site in the list: https://dl-ssl.google.com/android/repository/repository.xml. Select that site and a list of packages should appear below it. Wanting to play with different versions Android OS, enable all packages.

If you want to use only Android 2.2, then you only need to download packages such as: "Documentation for Android SDK, API8, revision 1"; "SDK Platform Android 2.2, API8, revision 1"; "Samples for SDK API8, revision 1"; and Google APIs by Google Inc., Android API8, revision 1."
Having selected the packages, click on the “Install Selected” button. This will take you to the “Choose Packages to Install” window for selecting packages to install, where all previously selected packages should be listed (by the way, if you didn’t encounter an HTTPS error when you first launched the SDK, this will be the first window you see). Do not click on the Install button yet. You will notice that some packages have a question mark next to them. This means that for each such package, before installing it, you must accept license agreement. Select all the packages with the question one by one and click on the Accept button. Then, when you see checkmarks next to all the packages, click the Install button.

Once you have selected all the packages to install, you will have to wait for them to finish downloading, which may take several minutes. When everything is finished, you will see a window with a message like, “Done, 12 packages installed.” Click Close.
Creating an Android Virtual Device
You are now ready to create your first virtual device. In fact, the Android SDK calls them Android Virtual Device or AVD, as I will continue to do. Select the Virtual Devices tab and click the New button.

You will see a window for creating a new Android virtual device - Create new Android Virtual Device (AVD). To create an AVD you don't have to do much. All you need is:
- Give your AVD a name. Any alphanumeric name will do;
- Select a landmark – Target. Here you select the version of Android OS on which the AVD will be based. Select, for example, Android 2.2;
- Set the SD card size - SD Card Size. Here you can specify the size of your AVD's virtual SD card. The size cannot be less than 9MB. For my example I chose 1GB;
- Select skin – Skin. You can choose any preset (built-in) or your own resolution. However, it is not at all necessary that the selected screen resolution or aspect ratio matches the screen resolution of a real phone. For this example, select WVGA800 (800x480) - this is the screen resolution of some phones, like the HTC Incredible. If you wish, you can set a resolution that can simulate an Android tablet (for example - 1024x600);
- Equipment – Hardware. The elements of this item will be selected automatically. There is no need to make any additions or changes here (unless, of course, you are a developer who knows exactly what he is doing).
Now click on the Create AVD button.

The AVD will be created very quickly, at the end of which you will see a pop-up window with a corresponding message about the creation of the AVD. To close it, click OK.
Please note that once you create an AVD, you will not be able to change its settings. Therefore, if you want to change anything, you will have to create a new AVD. Otherwise, the AVD you created should appear in the list of virtual devices - Virtual Devices.

To launch the AVD, click on it and then click on the Start button. You will see a Launch Options window - which will allow you to Scale the screen and wipe user data. You'll probably be attracted to the screen zoom feature, but you shouldn't use it. Otherwise, the window will be the physical size of a phone screen (only three inches tall).
You should not use the ability to erase user data (although later, when Android installation 1.6 AVD from the Android Market, we will still use this opportunity). Just click the Launch button to start the AVD.

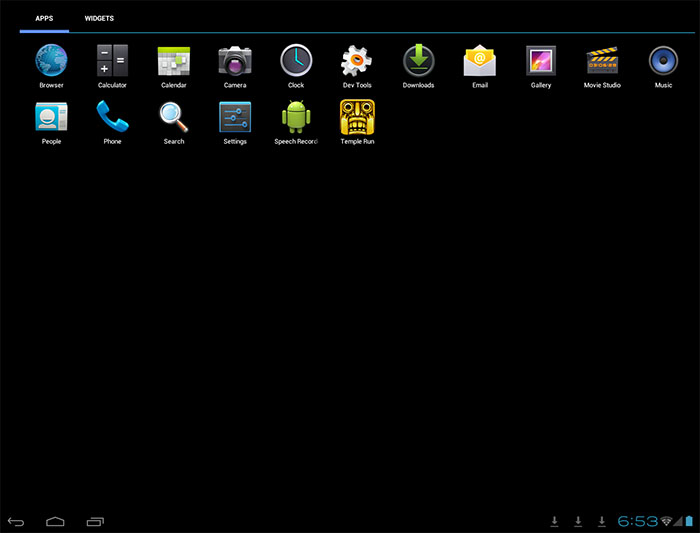
It may take a couple of minutes for the AVD to launch, so please be patient. Soon you will see on your screen - AVD. By the way, AVD is also called an “emulator” - emulator, because... it “emulates” an Android device.

One way or another, if you have a desire to download an Android emulator and try running applications and games in Windows 10, 8.1 or Windows 7, here you will find several ways to do this. New way 2015: How to run Android APK in Google Chrome (works for a very limited number of applications for now).
Nox App Player
Studying materials and reviews on this topic, we can conclude that Nox App Player is the best Android emulator for Windows. After my experience with it, I decided to put this product first in the review because it is really good. The developers claim compatibility with Windows 10 (How to check your computer for compatibility with Windows 10), Windows 8.1 and 7.
We install the emulator and launch it - we see the usual Android screen(version 4.4.2, Cyanogen Mod, 30 GB of internal memory) with Nova Launcher shell, with already installed file manager and browser. Despite the fact that the emulator itself does not have a Russian interface, “inside” Android you can enable the Russian language in the settings.

By default, the emulator opens in a tablet resolution of 1280x720 (if necessary, it can be changed in the settings tab (called by the gear icon at the top right) Advanced). Also, the default is set to low performance (Performance Setting), but even on a weak PC (How to speed up booting and shutting down your computer) it works perfectly.

The controls inside the emulator are very similar to any Android device. Available Play Market(How to download apk from Google Play Store), from where you can download applications and games and run them on Windows. Sound, as well as the camera (if you have one on your PC or laptop) work in the emulator, the computer keyboard also works inside the emulator, as well as its on-screen version.
Additionally, on the right side of the emulator window (which, by the way, can be opened in full screen without a noticeable loss in performance) there are action icons, among which are:
- Installing applications from APK files from your computer.
- Location substitution (you can manually set the location, which will be perceived by the emulator as received from the GPS receiver).
- Uploading and exporting files (you can simply drag and drop files onto the emulator window). This feature did not work as expected in my testing (the files seemed to be imported, but I found them in file system Android failed after that).
- Taking screenshots.
- For some purposes, Nox App Player also creates a Multi-Drive icon to launch several emulator windows at once. However, I haven’t figured out how it can be used or what it can be used for.
To sum it up brief description, if you need to run Android games and applications on Windows, use Instagram from a computer and do similar things, and you want the emulator to work without any brakes - Nox App Player will be an ideal option for these purposes; I have not yet seen better optimization ( but I can’t promise that heavy 3D games will work, I haven’t tested it personally).
You can download the Android Nox App Player emulator for free from the official website http://en.bignox.com
BlueStacks - for those who don't need a full-fledged emulator
BlueStacks is one of the most popular programs for Android launcher games on Windows. It is intended specifically for games and does not offer the user full Android emulation, however, this will be enough for many, and in games BlueStacks shows slightly better performance than most other emulators.
You can download BlueStacks from the official website http://www.bluestacks.com/home.html, it supports not only Windows (XP, 7 and 8), but also Mac OS X.
After installing the program, it will open in full screen mode, however, you can also enable windowed mode. In the main window you will see a list of games available for download (you can also use the search). To install applications you will need Google account(you can create a new one).

BlueStacks main window
In addition, if you have an Android smartphone or tablet, you can install the BlueStacks Cloud Connect application to sync applications between it and Windows.
Genymotion is a high-quality Android emulator with rich features
The Genymotion emulator is quite easy to install, allows you to emulate a wide range of real devices with different versions of Android OS and, most importantly, it works quickly and supports hardware acceleration graphics.
You can download Genymotion for Windows or Mac OS from the official website http://www.genymotion.com/. This emulator is available for download in both free and paid versions. For personal use, the free version is quite enough, there are no restrictions.
To download the Genymotion Android emulator you will need to register on the site, then use one of the download links. I recommend using the first one, which includes VirtualBox and automatically makes the necessary settings. When installing, do not launch VirtualBox; you will not need to launch it separately.

And after Genymotion has been installed and launched, in response to the message that no virtual devices were found, select creating a new one, then click the Connect button at the bottom right and enter the data that you specified when registering to access the list of devices . By choosing new virtual android device, wait for loading necessary components, after which it will appear in the list and you can launch it by double-clicking or using the Play button. In general, nothing complicated.
Upon completion you will receive a full Android system with wide additional features emulator, which can be found in more detail in the program help (in English).

Android game running on Windows using Genymotion
Note: when I created my first device, after downloading the files, the program reported an error in mounting the virtual disk. Restarting Genymotion as an administrator helped.
Windows Android or Windroy
This program with a simple name from Chinese programmers, as far as I could understand and see, is fundamentally different from other Android emulators for Windows. Judging by the information on the site, this is not emulation, but a porting of Android and Dalvik to Windows, using all the real hardware resources of the computer and Windows kernel. I advise you to read the material Tips for setting up and optimizing Windows.
Download Windows Android you can from the official website http://www.socketeq.com/, no problems were noticed during installation and startup (however, they say that not everyone can launch it), except that I was unable to switch the program to a windowed one mode (runs in full screen).
Note: install to the root of the disk; there is a lot of information about Windroy on thematic Russian-language forums.
Creating emulators in Android Virtual Device Manager
On the website for Android application developers - http://developer.android.com you can download everything you need for programming for Android (Android SDK). It goes without saying that this kit also includes tools for testing and debugging applications on virtual devices.
So this is the official way, but it's not too easy for regular user. If desired, you can find all instructions for installing the Android SDK and creating virtual devices on the specified website.
YouWave for Android
YouWave for Android is another simple program that allows you to run Android applications on Windows. You can download the emulator from the website http://youwave.com/. The developers promise high compatibility and performance. I myself have not launched this product, but judging by the reviews on the network, many users are happy with this option, while for some, YouWave is the only thing that launched from Android emulators.
That's it, hopefully one of the listed methods will allow you to experience Android on your Windows computer.
Despite the abundance of applications for Android devices, some users may be interested in running familiar Windows programs on their device. One of the most obvious ways to do this is to install an emulator of the desired operating system.
A QEMU
On this moment There are three most stable WinOS emulators for Android. QEMU is the fastest, but also crash-prone choice. Among other things, it will allow you to run a shell similar to Windows 95 or 98, that is, no modern frills. To launch we will need the files SDLapp.apk (install), SDL.zip (unpack to sdcard), as well as an OS image in *.img format (for example Windows 95 or Windows 98). We put the latter in the “SDL” folder of the sdcard directory. We directly launch Windows via SDLapp.apk. Among other things, it is worth mentioning that the Win95 image works better and is more adapted to interact with touch screens, however, there is no sound or network support in QEMU emulation, and work on further development of the project has been stopped.
Windows applications on Android – emulator BOCHS
Slow, clumsy, but reliable and stable emulator that supports Windows startup XP (in theory, you can run any i386 OS). It is installed by analogy with the first point: download and run Bochs2_5_1.apk, unpack SDL_for_BOCHS.zip into the SDL folder on the sdcard, and put the operating system image in it (QEMU will not work). We launch through the application installed first. This emulator supports access directly to the data storage of your Android device, making it easy to launch games and programs for Windows. However, BOCHS still does not have a network connection. In addition, on weak devices the emulator can take several tens of minutes to load.
Windows applications on Android – emulator aDOSBox and others
In addition to Windows images, this emulator will help you run old games designed for DOS. To install on Android, take aDosBox-v0.2.5.apk, install, unpack
At the moment, unfortunately, most Windows emulators provide much less functionality than the original systems. They run old games perfectly, but other than that their functionality is very limited.
A couple of years ago I didn’t even think about downloading an Android emulator for my usual Windows computer. But the popularity of Google’s brainchild cannot but surprise, of course it affected the entire industry information technologies— it’s simply unrealistic that there are a lot of different applications and games that work exclusively on Android and you can download them from, which I wrote about quite recently. This is actually why it was decided to write this guide on choosing the best emulator - it won’t work in a nutshell, there’s plenty to choose from.
In fact, there are really many reasons why there is a need to launch Android Emulator on his own personal computer or laptop. For example, application developers can test their programs before publishing it in the App Store on various configurations. Fans of a wide variety of games can use their favorite mice and keyboard over the years as controls in games - and this is really necessary (however, I don’t think they will replace gyroscope control). In any case, emulating Android applications in Windows is possible, and my task is to tell you about the best in this niche.
Two years ago I had the imprudence to install a game on my tablet Hay Day, well, I hung there for several days. The habit has done its job - playing on the computer is more familiar and convenient for me, but online versions does not exist in nature and it was decided to install the Bluestacks emulator. At that time, probably the only adequate option for running Android games on a PC under Windows control.
Important Note: For some emulators to work, it is necessary to enable support for Intel VT-x or AMD-v hardware virtualization in the BIOS (or UEFI). Usually they are always active, but if you are experiencing problems with some of the emulators on the list, then check these settings. However, that's not all, I noticed that during installation Hyper-V component in the system, many of the above emulators simply refused to start - I never found a solution to this problem, so choose what is more important to you. (There are quite a few alternatives to Hyper-V and they do not conflict - this is not meant to offend Microsoft)
Since we are talking about virtualization in general, we should understand that the Android emulator is a rather voracious thing and requires a sufficient number of random access memory. You can view its quantity in the system properties (for beginners there is a detailed note on how to determine computer parameters -), if you have less than 4 gigabytes of RAM, then most likely you will not be able to achieve comfortable work.

Do not forget that for correct operation and maximum performance, it is recommended to install the latest versions of drivers for graphics adapter. I did not include commercial versions in this review, because I understand that most likely it is needed to satisfy interest, and in general, to see how it happens there.
Nox App Player is perhaps the best emulator
To be honest, I only recently became acquainted with this emulator, but nevertheless it deserves the first line in our review. More recently, I thought that Bluestacks was the best for our tasks, but I was very wrong (although it probably was like that before). Now there is healthy competition in this segment and many truly worthy options. Most likely, if you don’t have any problems with NOX App Player, then your acquaintance with Android virtualization will end there - you simply won’t find anything better. Everything works great even on modern Windows 10 and I didn’t find any problems with installation or settings, everything is intuitive and simple.

After installing and launching the program, and it installs quite quickly - literally a couple of minutes - we will see the familiar Android screen in front of us (unfortunately, not the latest version, but only 4.4.2, but this is enough to run a huge number of games and applications). Already preinstalled in the system Google Play Market, so there shouldn’t be any problems choosing what to play. There is a small note: be prepared to confirm your Google account, authorization in NOX App Player causes distrust from the “good corporation”.

Unfortunately, the program is not localized into Russian, but Android itself allows you to switch to Russian - you can do this in the same way as on a phone or tablet. But all the program settings will remain in English, but this is not the most a big problem, set it up once and forget it.

Now let's move on to the settings (you can open them by clicking on the gear icon at the top of the program). We are interested in the “Advanced” tab - by default the emulator will launch with a resolution of 1280x720, for some this may be too much, or vice versa - too little, just select the one you need and restart the application. You can also configure your emulated device here, for example, Perfomance Setting - these are performance settings; as it turned out, even in the minimum configuration nothing slowed me down, which indicates good optimization.

For the test I tried to install the game Need For Speed: No Limits - everything works extremely smoothly and there are no problems with the controls. Of course, racing is not the best example, but as far as I know, this game is quite demanding on resources, but everything works just fine.

I would like to write a few words about the action icons that are located to the right of the emulator window, let's go over some of them:
- It is possible to install applications from APK files from a computer, this function useful if you have problems with the Google Play Store.
- You can select your location manually and the emulator will think that it is receiving the real coordinates of the GPS receiver, but we set them ourselves.
- Creating screenshots, I think there is nothing special to explain here - the most ordinary picture with the contents of a window at a certain moment.
What can be summarized after the mini description of the Android emulator Nox App Player? If you need to install Prescope, Instagram or similar programs, then this emulator is ideal for these purposes. There are no questions about the speed of operation, even heavy 3D toys work great, but you must understand that a lot depends on the performance of your computer.
UPD: If Nox App Player does not start for you or refuses to install, then most likely the username contains Russian characters. You can create a new user using only English characters or rename an existing one
You can download NOX App Player completely free of charge on the official website http://en.bignox.com/
Andy is my choice
I can’t say why, but I settled on this emulator - it seemed to me the most thoughtful and convenient. Unfortunately, the interface is similar to the previous one - on English language, but Android itself is in the familiar Russian language. Special problems There was no problem with installation and startup, everything went like clockwork.

This Android emulator has a pre-installed application store and for the test I tried installing Township and checking how everything works. To be honest, I got stuck and lost for about an hour - everything works smoothly, doesn’t crash or glitch.

There’s nothing special to configure; I think it’s worth highlighting the emulator’s screen resolution settings if suddenly the window turns out to be too large or small. The settings are called up by clicking on the program icon in the taskbar next to the clock, the menu item is called Set Resolution@DPI, and here the desired resolution is selected. Naturally, after applying the parameters, the program must be restarted for the settings to take effect.

If you are worried that this emulator has few settings, then you are mistaken, it has everything you need. You can also configure the allocated amount of RAM (do not forget that it cannot be more than what is physically installed in your computer) and the number of processor cores. On this I think we can finish the description of this wonderful application.
You can download Andy Emulator Android by going to the official website http://www.andyroid.net/
Bluestacks is a former favorite
Bluestacks is probably the most popular and well-known emulator of the Android operating system for a computer running Windows. The big advantage of this program is the presence of the Russian language, but it is not quite an emulator - rather an environment for running games. This is probably why Bluestacks shows excellent performance in gaming applications; if you don’t need anything else, then you can choose this option.

Unfortunately, after the update, it is no longer completely free - you will be forced to install certain applications every day or will be asked to pay a subscription of $2 per month. However, no one is stopping us from deleting unnecessary programs immediately after installation, but as they say, a sediment remained...

The test game Hay Day installed and launched without problems and synchronized perfectly with facebook account. I had no desire to play, but I didn’t have any problems with this emulator before and I don’t think there will be any now.
The main feature of Bluestacks TV is the ability to broadcast games online on Twitch. I think this feature will be especially in demand by streamers and will help make reviews of Android games simpler than ever before.

Complex and demanding games also launch without problems, but it feels slower than the same Andy or Nox App Player, so the choice is yours.
You can download the Bluestacks emulator by going to the official website of the program http://www.bluestacks.com/ru/index.html
Droid4x - Gamers' Choice
I often saw the Droid4X emulator in the comments - so I decided to test it too. As it turned out, it has a lot of problems - this concerns stability; during testing I constantly had problems. However, it has a lot of useful and necessary functions, so let's not discount it.

Of course, I can’t say that my computer is weak. (Core i5 and 24 GB RAM, HD5870 video card), but the configuration is quite old by computer standards, but I didn’t notice any hints of slowdowns in games, everything goes very smoothly. There is a fly in the ointment, I was never able to launch Plants VS Zombie 2 - the game constantly crashed and did not want to start under any circumstances, there were some problems with the keyboard that resolved themselves. The most unpleasant thing is that the emulator simply froze several times literally in half an hour of work, this will probably be very annoying. Maybe I have these problems specifically - it’s quite possible that everything will work stably for you, but, unfortunately, it didn’t work for me.

Of course, he also has a bright side - this concerns management. The fact is that out of the box it is remarkably adapted to the usual keyboard and mouse (scrolling left or right, zoom in or out using the mouse wheel - this is all native and familiar to us for a long time).
Droid4X also allows you to bind computer keyboard buttons to the desired areas of the screen, this can be very useful for games, in my opinion, this emulator was intended for games - there were no problems with the Play Market.

In general, the verdict is a good and productive Android emulator for a computer, but I have problems with it, as you will have - I can’t say, try it.
You can download Droid4X on the official website http://www.droid4x.com/
Genymotion - the best for developers
The Genymotion emulator is very different from all the programs presented on today's list; it allows you to emulate not only Android itself, but a wide range of real-life devices. It works quite quickly and supports hardware graphics acceleration, which is good news. The Russian language is not provided here, so some users may have difficulty mastering it.

The audience for this emulator is not avid gamers, but most likely software developers, and I simply wasn’t able to run many games. To get the program we are looking for, we need to register on the site and the opportunity to download the distribution for personal use will become available to us. I recommend using the version with VirtualBox - it's first on the list. There is no need to launch VirtualBox separately - you launch Genymotion and it does everything without your intervention.

So, as I already wrote, there is the opportunity to select the version of Android and the model of the real device, I don’t think that this is a necessary function for the average user, and developers will certainly be happy with this functionality. Click Next and the emulator automatically pulls everything from the Internet, we just have to make fine tuning applications.

In the configuration, we can choose the number of cores and the amount of RAM for the device, and we can also change the resolution - everything is only the most necessary.

Next, we need to select our newly created device in the list and click “Play”; in a couple of minutes, the ready-to-use image of the system we have chosen will launch. The emulator's capabilities are well documented, but again, a language barrier may prevent you from working with the program.
You can download Genymotion as usual, on the official website of the program https://www.genymotion.com/. This emulator has paid version with expanded functionality, but we are not interested in this, we look for the one that is For Personal Use and are happy.
Test results and my thoughts
Currently, there are a lot of Android emulators, for almost every taste and color. I distributed them based on my subjective opinion and it is not necessarily the only correct one - it is possible that for you, the presence of some functions will be decisive and then the favorite of this review will not be Nox App Player or Andy, but perhaps Bluestacks - it is the only one who can stream to Twitch out of the box , and the price of 2 bucks, in general, is rather symbolic and does not hit the pocket of a modern gamer much.
 Order 343 mail. Order by Russian post. Consequences of failure to appear in court when summoned
 How to put a password on a folder on a Windows computer without and with programs
 Pluton – Free Bootstrap HTML5 One Page Template
 History of ZX Spectrum: Myths and reality New Spectrum
 Voice assistant Siri from Apple Siri functions on iPhone 6s
 How to roll back to a previous version of iOS?
 Unlock iPad in four days