What is the ssd connector in macbook pro. Installing a PCI-e NVME SSD with an M.2 connector in Apple equipment. Installing M.2 SSD
Online store of spare parts and tools for Apple.
Today we will tell you how to save on an upgrade SSD drive and all Mac computers after 2013. As you know, OWC has released new drives with a capacity of up to 1 TB with a PCIe interface and a proprietary Apple connector. Disk speeds for this protocol are not great: up to 763 MB/s reading and 446 MB/s writing, but PCIe 2.0 allows you to achieve much higher speeds. And the price for 480GB is almost 30,000 rubles with delivery from the USA, and in Moscow from 44,000 rubles.
Most recently, Kingston released PCIe 2.0 SSD drives with an M.2 connector. Food is the same as Mac computers, but the connector is different. The task was set, the drawings were drawn, months of waiting and required adapter already in our office. All that remains is to install the disk through the adapter and carry out testing.
Brief installation instructions SSD Kingston M.2 in MacBook Retina 13" 2015.
Step 1
- unscrew 10 Pentalobe screws *1.2 with a screwdriver
- please note that the screws differ in shape and length, during the assembly process, return everything to its place

Step 2
- remove the plastic cover from the battery connector

Step 3
- disconnect the battery cable from the motherboard with a spatula

Step 4
- now that motherboard de-energized, unscrew the T5 screw that secures the standard SSD drive

Step 5
- carefully remove the SSD at a slight angle

Step 6
- prepare a new larger SSD with an adapter and insert it into the connector, it fits perfectly


Step 7
- install our disk with the adapter and assemble the laptop in reverse order

Step 8
- install clean OS X from a flash drive and test the new disk
After installing the operating system, we pass the BlackMagic Disk Speed Test. Windows results in the screenshot. The write speed at some points reached 561Mb/sec, and the read speed over 1Gb/sec. What did all this give us? A new 256Gb SSD disk for Mac PCIe devices of the latest generations costs from 25,000 rubles, and it will be a disk without any warranty, since Apple does not sell such disks, it will be a disassembled or used disk. We, using a magic adapter, installed a Kingston SHPM2280P2/240G 240GB drive (price on Yandex Market at the date of publication from 11,730 rubles). Total savings of over 10,000 rubles, taking into account the cost of the adapter, as well as a 3-year manufacturer’s warranty on the SSD drive.

Subscribe to our Blog on the site, we will spoil you with new articles about unique upgrades and repairs of Apple equipment
Step-by-step instructions with spare parts and necessary tool on Samsung example 960 EVO in Macbook Pro 13" Early 2015
Step-by-step instruction
![]()
Introduction
Depending on the circumstances, whether the standard SSD fails or there is not enough gigabytes, it may be necessary to replace the solid-state drive. The price of original SSDs or analogues from Transcend or OWC is very steep, so we will tell you how to save money and, most importantly, increase performance.
Important: NVME support appeared in MacOS in High Sierra, so before installing of this type drives need to be upgraded to it or to the new MacOS Mojave in advance.
Work should be carried out with antistatic gloves or remove static with a bracelet.


Bootable USB flash drive
Let's start with creating bootable flash drive. To do this, download the installation distribution from App Store so that it is in "Applications". We format a blank flash drive with a capacity of at least 8GB in Mac OS Extended (journaled) with GUID sections and call it, for example, youroptibay. Open the "Terminal" and enter the command sudo /Applications/Install\ macOS\ High\ Sierra.app/Contents/Resources/createinstallmedia --volume /Volumes/youroptibay --applicationpath /Applications/Install\ macOS\ High\ Sierra.app -- nointeraction(In Mojave we enter
sudo /Applications/Install\ macOS High Sierra.app/Contents/Resources/createinstallmedia --volume /Volumes/youroptibay --applicationpath /Applications/Install\ macOS High Sierra.app --nointeraction)
We wait for the inscription Done and proceed with the installation.


Removing the back cover
Remove the highlighted ten screws that secure the bottom cover to the chassis:Screw 2.3 mm Pentalobe *1.2 - 2 pcs.
Screw 3 mm Pentalobe *1.2- 8 pcs.


Disabling the battery
We disconnect the battery connector in order to turn off the power to the MacBook and not accidentally short-circuit anything.

Preparing the adapter
We prepare the adapter. It is necessary to insulate a number of contacts, as shown in the photo, to avoid shorting the metal connector on the motherboard.


Installing M.2 SSD
To install the adapter you need to apply a little force. Insert the adapter into the connector and, placing one finger on the back of the connector, press it until it clicks. Install the NVME drive into the adapter and secure it. Next, connect the battery and screw on the cover. At this point the mechanical work is completed, all other actions are software.


Starting the installation
We install the flash drive created in the first step, turn on the poppy and hold down Alt. This will allow you to select the download source, in our case "Install MacOS High Sierra". Select and press Enter.
Installing MacOS
After loading, a window will appear in which we select and launch “Disk Utility”. Further, the installation process is purely individual and the data varies depending on the Mac model and year of manufacture. We'll look at everything possible options and problem solving.


Installing MacOS
On a Macbook Pro Retina 13" Early 2015, in our case, the disk was immediately displayed in the disk utility, but this may not happen. In this case, click the icon in the upper left corner and check the "show all devices" box. Still not displayed? Go to the disk utility utility and check whether the poppy sees it in principle, using the command diskutil list. In the list that opens, it will be at the very top as /dev/disk0 (internal). (If it is not there, we disassemble the poppy, check the insulation of the adapter, look again). Next we install it with the command diskutil mountdisk disk0(due to software features High Sierra may not connect the first time and you need to enter the command two or three times). We leave the terminal.Apple has always been expensive when it comes to pricing storage in its devices. In both the iPhone, iPad, and MacBook, every step to increase the storage capacity costs a pretty penny. And gigabytes from Apple are significantly more expensive than the market average. There is no doubt about it, these are usually very fast gigabytes, and you don’t have to particularly regret overpaying. And yet sometimes the toad strangles. And you buy the option with a smaller drive. You hope to squeeze in and somehow get by. But you always, absolutely always face a lack of volume.
In the case of iPhone and iPad problem partly, and on relatively old MacBooks (before 2016) you can change the SSD. But if you use original components, this is a very expensive pleasure. For example, a 256 GB drive will cost 30 thousand rubles if you buy a new one, and 18-20 thousand for a used one. It bites, you know. Meanwhile, “just an SSD” of this size is sold for 9-10 thousand. For 16-18 thousand you can get a 512 gigabyte model. The proprietary nature of the Apple connector is overcome with the help of an adapter, which costs about 1000 rubles on Aliexpress, and 2-3 thousand in Russian shops.
The autopsy showed...
I’ll tell you about my own experience with the MacBook Pro 13, model Early 2015. I got it with a 128 gigabyte SSD, which, in general, was enough, but still somehow itched - suddenly I need to edit some kind of incendiary video, and not enough space? For some reason I didn’t want to spend 30 thousand. But with non-native SSDs, everything is not so simple. The fact is that Apple has its own problems, because of which disks from other manufacturers appear operating system only after dancing with a tambourine, turning on TRIM also requires shamanism, and there are also problems with hibernation, which has to be turned off.
In particular, such overlays occur with the Samsung 960 EVO, which is often purchased to upgrade MacBooks. I didn't want to deal with something like this.
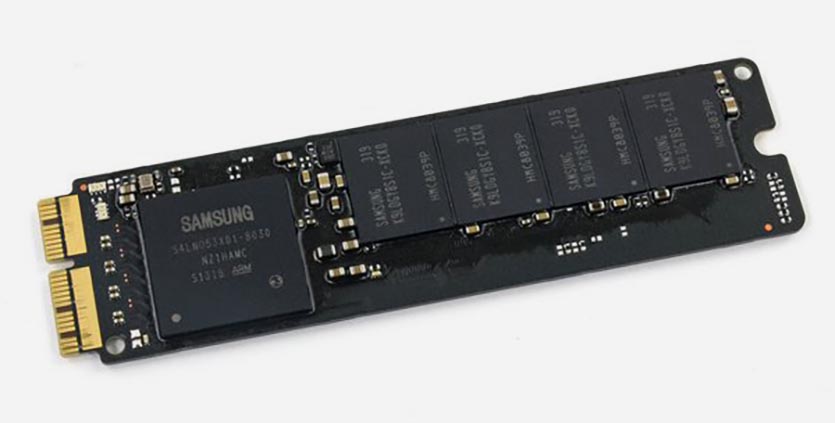
 It’s even funny that Samsung SSDs are trying to glitch in MacBooks, because, as you can easily see, the original SSD (pictured below) was made by nobody.
 Deep googling showed that one of the least problematic SSDs for the MacBook Pro Early 2015 is the Kingston KC1000. The 240 GB model (I certainly don’t need more) costs an average of 8,500 rubles. For this we get a drive with a stated read speed of 2700 MB/s and write speed of 900 MB/s. For comparison, the original Apple SSD produces 1200/700 read and write speeds, respectively. It’s worth mentioning here that Kingston’s recording is relatively slow only on the younger model, and already from 480 GB it grows to 1600 MB/s. But, I repeat, I don’t need such a volume, and overpaying would not make any sense.
Considering that I had never upgraded a MacBook before, I asked the guys from the Fixed.One service to help me with this matter. Looking ahead a little, I will say that if you have special screwdrivers (five- and hexagonal stars), the operation can be done at home.
Let's go. First we unscrew back cover and admire how beautifully everything is arranged inside. The SSD is secured with one screw. A slight movement and the slot is free.
 Above is a Kingston SSD with an adapter already installed
 The adapter came from China, it looks modest, but, on the other hand, it doesn’t need to work miracles. There are no electronics on it - everything is limited to redirecting contacts from the Apple connector to a regular M.2 connector. Something similar happened with proprietary Sony cards: it quickly became clear that regular microSD can be inserted into a portable PSP console just fine through a cheap adapter.
The installation procedure is as follows: first insert the adapter into the connector, then insert the new SSD into it. If we are talking about a capacious model (for example, a terabyte), it makes sense to wrap the contact area with thermal tape for secure fastening and additional heat removal. But in our case, this would be clearly unnecessary, because this Kingston model heats up very moderately, and in conjunction with the existing adapter, it sticks out above the board slightly higher than the original and is in excellent contact with the thermal interface on the lid. The length matches completely, so the KC1000 was fixed with a screw from its predecessor.

When turned on, the MacBook expectedly complained that there was no boot disk, but after inserting the flash drive with the High Sierra distribution, I immediately saw the new SSD and offered to install the OS on it. A very important point: without upgrading to High Sierra, it is impossible to install a third-party drive, and you need to upgrade the operating system BEFORE replacing the drive.

The installation went without the slightest hiccups. It’s real - there’s not even anything to tell. Once completed, I restored all the data from the Time Machine copy on the flash drive. This turned out to be significantly faster than over the air, but still slow relative to the capabilities of the flash drive. It can transfer up to 300 megabytes per second, and recovery proceeded at an average speed of 20 megabytes, only sometimes increasing to 40-50 megabytes.
Immediately after the recovery, I ran a benchmark and, frankly, was pretty discouraged: according to its data, the read and write speed was below 400 MB/s. At the same time, the speed of work was the same. Launching applications, switching between them - that's it. I have a suspicion that the problem is in the background tasks with which the system loads the disk, and in particular with the Spotlight indexing service. The latter works furiously in the first days after installing a new drive, re-learning files, letters, contacts, etc., which leads not only to slower operation, but also to increased energy consumption. You can disable indexing by entering the command in Terminal sudo mdutil -a -i off. But it’s probably better to just wait until the system realizes itself again and calms down.

Actually, the very next day the benchmark showed completely different, more encouraging numbers. This is not at the peak of SSD capabilities, but noticeably higher than on the original drive, released, let me remind you, three years ago.
What pitfalls may arise? Firstly, with a non-native SSD, the MacBook Pro tends to wake up incorrectly from hibernation - it crashes and goes into reboot. I had this happen a couple of times, but only on the first day, when FileVault data encryption was going on in the background. After it ended (pah-pah-pah) everything became normal. If your problem persists, you need to type the command in the terminal sudo pmset -a hibernatemode 25. But the best thing, as experts say, is to reset the laptop and set it up from scratch, rather than restore it from Time Machine. Then there will be no problems getting out of sleep. I haven’t checked it myself yet, but I trust the experts.
Secondly, the drive may not operate at full capacity. This is also stated in the honest descriptions of the adapters: they do not pump more than 2 GB/s. Plus, not all PCI Express lines can work, for example, only two instead of the maximum four. My diagnostic utility shows either x2 or x4. This does not affect performance. And by the way, I don’t even know - maybe the original SSD had the same problem.
But in general, especially after the release of High Sierra 10.13.3, third-party SSDs work decently, and if you're lucky with the adapter, you'll save a very significant amount. To be lucky, it is better to buy it in Russia and from companies that conduct preliminary testing of this kind of hardware.

Many thanks to Fixed.One for help with the upgrade. The Kingston KC1000 has shown full suitability for use in a MacBook, and given that they have a maximum capacity of 960 GB, this will allow someone to increase the storage capacity to a very impressive size at a very reasonable cost.
Views: 12,889
He gave Apple technology lovers hope for an update to the entire line of professional computers.
Even though the beloved slots for SD cards and USB-A connectors will never be returned to the MacBook, we still got a very comfortable keyboard instead of a sticky butterfly.
In six months or a year, it will be possible to replace old Retina models with updated laptops. To give a second life to the “old guys” and work for them for some more time, we suggest making a simple upgrade.
We will only consider models that support installation macOS Catalina:
▸ MacBook Pro mid 2012 or later
▸ MacBook Air mid 2012 or newer
▸ MacBook Retina early 2015 or newer
Upgrade impossible on a 12-inch MacBook, which was produced from 2015 to 2017, but new Macs Book Air 2018-2019 and on MacBook Pro starting with 2016 models (TouchBar/Type-C).
The instructions are not suitable for new Macs with the T2 chip. Such manipulations require
On older devices (MacBook Pro Retina and MacBook Air), you can replace the SSD drive. Upgrade random access memory could be done on the previous generation of laptops in a unibody case (laptops from 2008 to 2012 without a Retina display).
MacBook Pro Retina
Models that were produced between mid-2012 and mid-2015 are considered to be the third generation of MacBook Pro. This entire line is also called Retina.
It includes 7 modifications with screen diagonals of 13″ and 15″:
Mid 2012: MC975LL/A, MC976LL/A, MD831LL/A
Late 2012: MD212LL/A, MD213LL/A, Z0N43LL/A
Early 2013: ME662LL/A, ME664LL/A, ME665LL/A
Late 2013: ME864LL/A, ME865LL/A, ME866LL/A, ME293LL/A, ME294LL/A, ME874LL/A
Mid 2014: MGX72LL/A, MGX82LL/A, MGX92LL/A, MGXA2LL/A, MGXC2LL/A
Early 2015: MF839LL/A, MF840LL/A, MF841LL/A
Mid 2015: MJLQ2LL/A, MJLT2LL/A
MacBook Air

Among the “air” laptops, we will use devices that were released from mid-2012 to mid-2017.
Upgrade is possible to any of five modifications 11″ and 13″:
Mid 2012: MD223LL/A, MD224LL/A, MD231LL/A, MD232LL/A
Mid 2013: MD711LL/A, MD712LL/A, MD760LL/A, MD761LL/A
Early 2014: MD711LL/B, MD712LL/B, MD760LL/B, MD761LL/B
Early 2015: MJVM2LL/A, MJVP2LL/A, MJVE2LL/A, MJVG2LL/A, MMGF2LL/A, MMGG2LL/A
Mid 2017: MQD32LL/A, MQD42LL/A
Which drive to choose
Cupertino has done everything to make upgrading a laptop drive problematic. The replacement procedure itself is not very complicated; it is more difficult to choose a suitable SSD.
The MacBook Pro and MacBook Air of these generations used SSDs with a specific connector, which differ from most SSDs with an M2 connector.
The upgrade can be done as follows:
▸ find the original SSD from Apple desired volume that was removed from another MacBook. Such discs are very rarely found on sale.
▸ find third-party SSDs with a similar connector. There is more choice here, but the prices are still high. There are several models of the OWC brand: Aura Pro X2 and Aura Pro 6G, Transcend has similar drives: JetDrive 725 or JetDrive 850
▸ connect a regular M2 format SSD drive through a special adapter: this one or this one.
In the first case, it is best to order the necessary components in the USA at eBay. In the second case good option there will be a model from Transcend, along with the drive you will receive an adapter for connecting the drive via USB, so you can quickly deploy backup copy system on the SSD before installing it in the MacBook. After the upgrade, you can put the old SSD in the adapter and make it external USB disk.

If you choose a model from another manufacturer, a similar dock can be purchased on AliExpress.
In the case of an adapter, you should carefully select the model of the adapter itself and the model of the SSD suitable for it. The choice is very large, but you can make a mistake.
Attention! For different models The presented laptops are suitable for SSD different types and size. With the first one, everything is simple: MacBook models up to and including the beginning of 2013 work with drives mSATA, and newer devices (from mid-2013) need disks m2 format. The physical dimensions of the SSD depend on specific model. A bar that is too large or wide will simply not fit into the space allotted to it inside the case.

To avoid errors, check the drive dimensions for your MacBook Pro or MacBook Air on the website iFixit.
Only after this, select a new SSD and an adapter for it.

For those who are looking at Transcend drives, a convenient table has been posted on the company’s website. There you can find the right disk model for your laptop.
How to replace SSD
1. Create a system backup via Time Machine or using .
If you purchased a replacement drive with an external dock, you can immediately connect it via USB, format it in disk utility and deploy a backup to it.
2. Create a USB flash drive for a clean installation of macOS.
3. Turn off your laptop to begin replacing the SSD.

4. Remove the back cover of the laptop. To do this you will need a screwdriver and a bit. P5.
5. Using plastic objects, carefully disconnect the battery cable.

6. Using a screwdriver T5 Unscrew the standard SSD mount and carefully remove it.

7. Replace the new drive and reassemble the laptop in reverse order.
Fair, not overpriced and not underestimated. There should be prices on the Service website. Necessarily! without asterisks, clear and detailed, where technically possible - as accurate and conclusive as possible.
If spare parts are available, up to 85% of complex repairs can be completed in 1-2 days. Modular repairs require much less time. The website shows the approximate duration of any repair.
Warranty and responsibility
A guarantee must be given for any repairs. Everything is described on the website and in the documents. The guarantee is self-confidence and respect for you. A 3-6 month warranty is good and sufficient. It is needed to check quality and hidden defects that cannot be detected immediately. You see honest and realistic terms (not 3 years), you can be sure that they will help you.
Half the battle is Apple repair- this is the quality and reliability of spare parts, so a good service works with suppliers directly, there are always several reliable channels and your own warehouse with proven spare parts for current models, so that you do not have to waste extra time.
This is very important and has already become a rule of good manners for service center. Diagnostics is the most difficult and important part of the repair, but you don't have to pay a penny for it, even if you don't repair the device based on its results.
Service repairs and delivery
Good service We value your time, which is why we offer free shipping. And for the same reason, repairs are carried out only in the workshop of a service center: they can be done correctly and according to technology only in a prepared place.
Convenient schedule
If the Service works for you, and not for itself, then it is always open! absolutely. The schedule should be convenient to fit in before and after work. Good service works on weekends and holidays. We are waiting for you and working on your devices every day: 9:00 - 21:00
The reputation of professionals consists of several points
Company age and experience
Reliable and experienced service has been known for a long time.
If a company has been on the market for many years and has managed to establish itself as an expert, people turn to it, write about it, and recommend it. We know what we are talking about, since 98% of incoming devices in the service center are restored.
Other service centers trust us and refer complex cases to us.
How many masters in areas
If there are always several engineers waiting for you for each type of equipment, you can be sure:
1. there will be no queue (or it will be minimal) - your device will be taken care of right away.
2. you give to Macbook repair an expert in the field of Mac repairs. He knows all the secrets of these devices
Technical literacy
If you ask a question, a specialist should answer it as accurately as possible.
So that you can imagine what exactly you need.
They will try to solve the problem. In most cases, from the description you can understand what happened and how to fix the problem.
 Order 343 mail. Order by Russian post. Consequences of failure to appear in court when summoned
 How to put a password on a folder on a Windows computer without and with programs
 Pluton – Free Bootstrap HTML5 One Page Template
 History of ZX Spectrum: Myths and reality New Spectrum
 Voice assistant Siri from Apple Siri functions on iPhone 6s
 How to roll back to a previous version of iOS?
 Unlock iPad in four days