Plexiglas computer case. How to make a computer case from plexiglass with your own hands Do-it-yourself system unit plexiglass case
Good afternoon, Khabrovsk residents. Thank you very much for the invite! And although starting with translating other people’s posts is not the best good idea, perhaps this homemade project will seem mega-cool to someone else.
This is a translation of a post from the Overclock.net forum. User Show4Pro decided to take out all the insides of his super computer and hang everything on the wall. Great idea perfectly executed. For those who are interested in how it was assembled and how it works - welcome to the cat.
Last time I updated mine home car 1.5 years ago. Well, I thought about upgrading the car to i7 (before that it was Bloomfield), although in fact I didn’t need a more powerful processor. I wanted to buy a new case - Corsair 900D, to replace the 8 year old Super Armor. But I wanted something special, unique. In Battlestations on Reddit, I came across a very simple but elegant solution - a wall computer. And that's where the whole project began.
Accessories:
CPU: Intel Core i7 950
Motherboard: Asus Rampage III Extreme
Video cards: 2 x AMD HD7970
RAM: 6 x 2GB Corsair Dominator
SSD drives: 4 x 120GB Corsair Force GT SSD
HDD drives: 2 x 1TB WD Caviar Black
2TB WD Caviar Green
1.5TB WD Caviar Green
Power supply: Corsair AX1200i
Sound: Creative Sound Blaster Zx
Cooling:
Cooling for CPU:
CPU Water Cooling Radiator EK Supreme HF Full Copper
Pump Swiftech MCP655 /w Speed Control
The cooler itself FrozenQ Liquid Fusion V Series 400 ml Reservoir - Blood Red
XSPC RX360 Performance Triple 120mm Radiator
GPU cooling
Heatsink for video card EK FC7970 - Acetal+EN
The pump and cooler are the same as for the processor.
Swiftech MCP655/w Speed Control
FrozenQ Liquid Fusion V Series 400 ml Reservoir - Blood Red
Water cooling radiator Watercool MO-RA3 9x120 LT Radiator
Other:
Cooling system pipes
Koolance QD4 Quick Discounnect No-Spill Coupling
Bitspower G1/4 Silver Triple Rotary 90deg Compression Fittings
Monsoon Free Center Compression Fittings
Phobya Angled Clip 90° Tubing Guide
Phobya Terminal Strip Tubing Clip/Holder
The cooling tubes themselves (red) PrimoChill Advanced LRT Tubing Bloodshed Red
Phosphorizing refrigerant, blue color EK UV Blue Non-Conductive Fluid
Cables:
Bitfenix Alchemy Premium Sleeved Extensions
Corsair Individually Sleeved Modular Cables
Creation.
To begin with, I took photographs of all the components in their actual sizes and put it all together in Photoshop. This way I was able to move them around the work surface and decide what it would look like. Well, this is also necessary for routing the cooling pipes. Here are a couple of layouts:
I abandoned this because of the empty space in the lower right corner. And the motherboard ended up on the left, although it should be in the very center and attract attention to the entire panel. 
There is also a lot of space on the right, although the power supply and motherboard are closer to the center. In the final version, the cooling tubes stretch along the entire right edge, plus two thermometers appeared there.

I transfer the drawing of the motherboard onto an acrylic sheet.

Since the video adapters will be far from the motherboard, I ordered PCIe slot extenders for each card on eBay. This is me testing how they work. However, later I had huge problems with the cross-function of the cards due to cheap unshielded wires. They ended up on top of each other and created serious interference. The system was stuck loading the BIOS. It was possible to launch it with only one card. In the end, I had to shell out for very expensive cables with good protection. But more on that later.

The goods have arrived!

Most of the water cooling is from Performance-PC. They even gave me a T-shirt and two mouse pads!

Acrylic backing for motherboard.

All acrylic panels are cut at 45° to achieve a glowing edge effect.

The holes are drilled and the fasteners are installed.
TA-dah!!! It turns out that the mother of Rampage III Extreme is eATX format. And this is for the ATX form factor.
I made the correct eATX substrate later.

Time to gut my old dusty case.


In the old computer, the disks are inserted into Vantec HDCS boxes, which make 3 HDD boxes out of 2 5.25" ones.


Video cards.

Supports for all components.

Custom acrylic pump mounts.

Close-up of a rough finish done with a table saw. They will need to be sanded later.

There is a triangular cut in the center of each plate. It will reflect light that is projected perpendicularly inside the plate at the edges. Without a cut, the edges barely glow.


Test with the light on on the sound panel.

All panels are sanded with 120 grit wet sandpaper.

Close-up of sanding.
All back panels are pre-drilled.
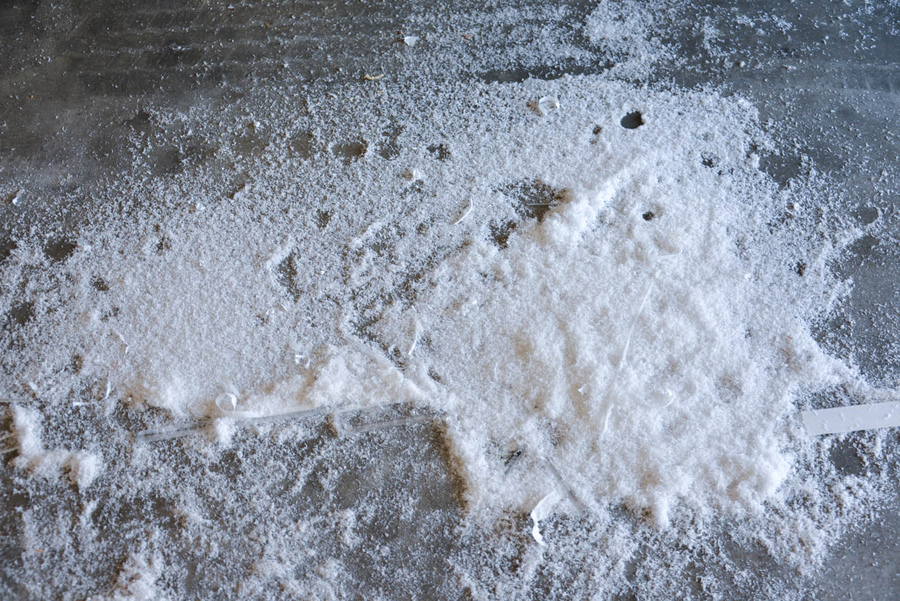
Under the table is acrylic snow.

Preparing to paint red.
Surprisingly, Corsair included thermal pads on the blades, although they don't get hot at all.

Marking all components on the main board to mark various slots and holes. Board - 1/4" 48 x 30 fiberboard.

All cracks and holes are marked in their places.

I'm getting ready to cut out the slots with a jigsaw.


I glue the frame.


I paint the inner edges black - to match the color of the carbon film.


Soldering LED strips.

Workplace.


LED strips. Temporary fastening.

I glue a giant vinyl film. This was the cruelest part. I almost had a heart attack. How to stick a film on a phone screen, only x1000 more.

No bubbles!


I use aluminum tape to hide the LED on the front side of the panel for hard drives, between them.

My assistant is Tommy.

All substrates are installed in their places on the common board using #10 screws. I screwed them into pre-prepared holes.


Checking the light.

Coolant and cables have arrived. I used Bitfenix for the components and Corsair for the power supply.


On the left is Bitfenix, on the right is Corsair. Bitfenix doesn't have black heat shrink on the ends, so the Corsair looks cooler.

Red zip ties to tie up hanging wires.

Backside. All cables are connected.

We test for leaks while the entire system is lying on the floor - this makes it easier to troubleshoot problems.
First start.
Not loaded. I connected via iROG USB to the laptop to view the download log. It turned out that the system was stuck on the VGA BIOS. I disabled one of the video cards - everything worked. I tried to connect another one - it also works. Both cards are not. Did some research and found that unshielded PCIe extenders with ribbon cables are very susceptible to EMI. I tried to shield them by wrapping them in several layers of aluminum foil. 

After 4 layers of foil I was able to get both cards running. But the machine immediately froze as soon as I launched any game or any 3D editor. Moreover, my Soundblaster is also cascaded with a cable to the 3 x1 PCIe slot, and this also greatly interfered with the operation of the video and hung up the system.
As a result, with pain in my heart, I had to order expensive protected extenders for PCIe slots from 3M (approx. $100 each)

Shielded 3M extension cords in place. They turned out to be longer than the previous ones and now both video cards have reached PCIe x16.


Changed the previous sound to SoundBlaster Zx. This one looks amazing!

And finally
On this moment everything works smoothly. The installation has only 2 fans. It barely moves on the PSU, and I installed another one on the chipset - it’s very quiet. The pump runs at the lowest power, so the computer came out quite quiet. The only annoying thing is that it turns out that some components can be heard operating outside the case. In my case, this is the buzzing of the video and 1TV hard drive.EK UV refrigerant is very sensitive to ultraviolet radiation. I know you shouldn't mix coolants to preserve their properties, but damn if I used it undiluted, I wouldn't be able to see the coils in the reservoir. For both circuits I used about 1/8 of the jar, the rest was distilled water.
From the translator
I in no way claim any authorship of this incredible project. It’s just that I’m a journalist with a degree in electronics engineering, and doing such things is my dream. And to be honest, I would make a table, not a wall. So I decided, suddenly not all Khabrovsk residents are sitting onTransparent or with glass inserts PC case, and even with a spectacular LED- illumination will decorate any room made in a more or less modern design. Such system units, in addition to aesthetics, also have a practical application: we will be forced to quickly respond to the slightest dust inside and protect the computer from overheating of components. Are there any disadvantages to transparent cases?
Of course, there are, however, like many other things. But definitely not in such numbers as armchair experts - spreaders of myths, who somewhere somehow learned something from someone, but have never seen the object of the spread of gossip in person - are credited to them. What are the real pros and cons of transparent systems systems?
So, transparent PC cases: on stands in stores and in photos on the Internet, they always look impeccable, stylish, and futuristic.
But what really?
1. Material
Transparent one-piece computer cases and inserts on combined models are usually made of plexiglass, also known as colorless acrylic. This is an easy-to-process material, inexpensive, durable. However, it is susceptible to scratches and abrasions. So such a body needs to be protected from the very beginning, at least to determine a place for it where we will not accidentally kick it.

There is an opinion that a transparent system unit smells bad. They say that when plexiglass is heated, due to the release of heat from the PC components, it spreads a pungent odor and synthetic fumes throughout the room that are harmful to the human body. This is wrong. Plexiglas melts at a temperature 160°. This is much higher than the critical temperatures of components, upon reaching which the computer in most cases will simply turn off due to protection. In terms of unpleasant odors and fumes harmful to humans, there are many more questions, for example, about stretch ceilings made from low-quality Chinese film. Nevertheless, they can be found in many offices, apartments and houses with budget renovations.
2. Static electricity
Another myth spread by sofa experts is that the plexiglass case accumulates static electricity in such a volume that it can result in the destruction of PC components. This is wrong. Statics are accumulated by system units from any material on the market - plexiglass, plastic, iron.
3. Order inside
Whether the PC case is made entirely of plexiglass, whether it has only a transparent insert, even whether this insert is tinted - in any case, the aesthetic effect will only take place if order is placed inside. To do this, you need the wires to be neatly and neatly laid out inside the system unit.

Well, there was no excessive dust.
4. Cost
Another myth is that cases with transparent inserts are very expensive. It is not always so. The price of a system unit is determined not only by the material, but also by the form factor, availability/quality power supply, front panel functions (USB, headphone and microphone outputs, card reader, etc.) , additional, in particular, water cooling, etc. Of course, models with standard transparent coolers, with spectacular lighting, with a high-quality power supply, from famous brands, etc. will cost decent money. However, on the market you can also find cases for reasonable price— which from the base model without plexiglass insert and with it (with backlight to boot) will separate the extra 300-400 rubles. Well, it will be able to offer goods for different wallets, including not the thickest ones.

True, with all the ensuing risks and functional limitations.
5. DIY transparent case
There are a lot of instructions on the Internet on how to make a transparent PC case with your own hands. They lay out in detail "recipes" creating transparent boxes with compartments for components using imagination at the design and finishing stages. Or it shows how you can transform an ordinary old hardware system unit into one with a side glass insert. Fortunately, the same can offer a variety of solutions for implementation in a PC case LED-backlights and even ready-made coolers glowing with all the colors of the rainbow.

Of course, if you make it yourself, you can realize your wildest fantasies. But... Without skill, without accuracy, without at least partially free resources, this kind of craft will be no more than clearly noticeable "masterpiece" handicraft art, in which at least half of the finished product from the store has been invested:
with neat joints,
no traces of liquid nails;
with the design of the form factor itself not 10 years ago;
not with LED lighting hidden inside the case, but with luminous coolers made of the same plexiglass.
6. What you should pay attention to when purchasing
When buying a transparent system unit, you need to carefully inspect the glass for scratches and abrasions. And these, by the way, may be invisible due to the transport film. It is better to carry out the inspection without it.
Plexiglass should not be soapy. It’s not that the insufficiently crystalline transparency of the material affects the effect as a whole, but rather the situation here "expectations/reality". If we pay for aesthetic pleasure, then we should receive it in the smallest detail.
You need to make sure that the model of the selected case provides the ability to adjust the backlight. So that it can be made weaker or turned off completely. Excessively bright light from coolers will ideally serve as a night light, but it will also interfere with sleep at night.

Plexiglas goes well with technology; it’s not for nothing that this material is so popular in high-tech and futurism styles. Among other things, it makes impressive computer cases. They can be purchased ready-made or made yourself. The latter is not so difficult. In addition, the material allows you to realize your own ideas. Let's look at how to make a plexiglass case with your own hands.
Advantages of plexiglass
Plexiglas is used to make computer cases due to its advantages such as lightness, impact resistance and aesthetics. Most often, transparent plexiglass is used to create a case - many see a peculiar beauty in the open display of wires and circuit boards. If you want to hide the internal “stuffing” of the computer, use matte sheets.
To create a computer case, transparent plexiglass material is most often used.
The pliability of this material is also important - even a beginner can cut and glue it.
Video: “Plexiglass case”
From this video you will learn how to make a computer case from plexiglass with your own hands:
Step-by-step instruction
Let's look at the procedure for creating a plexiglass case.
Preparatory stages
First you need to prepare the tools:
- metal jigsaw, hacksaw or grinder;
- heat gun or glue;
- self-tapping screws;
- metal drill;
- plastic legs.

Before you start creating a plexiglass case, you should take the markings from the old case
To make calculations, first measure the old case, then add 1.5–2 cm to each side. Also note that you will need a stand for a motherboard of the appropriate size, as well as racks for FDD, HDD and CD-ROM. For simplicity, they can be made the same as they were in the previous building.
Use plexiglass no thinner than 5 mm. For the bottom and back wall, on which the fan and other parts are attached, you can take sheets up to 10 cm.
To connect individual elements of the body, use self-tapping screws, a heat gun or glue. The first option is more convenient: at some point you may need to disassemble the structure. In any case, at least one side wall must be removable.
 To create a plexiglass case, plexiglass sheets no thinner than 5 mm are used
 Before using self-tapping screws, test them on a small piece of the same plexiglass from which the body elements are made. If the material cracks when screwed in, choose either a stronger sheet or thinner screws.
For plexiglass you can use such types of glue as Acrifix, COLACRIL, Cosmofen, Dichloroethane. Please note that the latter remedy is extremely toxic and when working with it you must carefully observe safety precautions.
Creating a box
The box is assembled as follows:

There are many ways to additionally decorate such a case. For example, one of the side walls can be engraved or etched with acid in advance.
For illumination, ordinary LEDs or LED strip are used. Additionally, you can make several fancy “lamps” from plexiglass in the style of futurism or steampunk.
If desired, the casing can be mounted on the wall.
With sufficient experience working with plexiglass and an understanding of how a computer functions, the case can be made non-standard shape: in the form of a pyramid, a ball, a stylized robot, etc. It all depends on your imagination.
“The need for invention is cunning,” says the old proverb, and computer enthusiasts have never complained about a lack of creativity. Unusual computer cases are one of the manifestations of developed imagination and resourcefulness. These people are not stopped by the fact that after purchasing suitable hardware there was no available funds for a housing for it. “Kulibins” prove that a lack of funds is not an obstacle when assembling a computer. This material about cool PC cases is dedicated to the creations of such creative people.
I bought a case, but didn’t have enough for hardware
There are also situations when you have a high-quality case at hand, but there is nothing to put in it. What to do in such a situation? You can find a set of iron “from the time of dinosaurs” at a flea market, but not everyone will like this approach. Such components make noise, collect dust, consume electricity, and can even break at the wrong time.
American enthusiasts have developed a Raspberry Pi mini-computer, priced at about $30, which is slightly larger in size than a credit card. The board of this little thing contains a filling comparable to that of an average smartphone, and when installing the Linux OS, such a PC can be used for watching movies, surfing the Internet and other simple tasks. In the example given, just such a computer is installed in a desktop PC case.
The supermarket will help us
Do you have access to old fruit containers at the supermarket or green market? Then you can make a cool PC case for just a hundred rubles. A potato box, some cable ties, and the case is ready. 
This PC can be called an example of minimalism and ingenuity rolled into one, but there are stranger computer cases.
All my life I dreamed of a laptop
I want to powerful laptop, but you don’t have enough money, and taking out a loan is not an option? Then a toolbox and a matrix from an LCD monitor come to the rescue. A little ingenuity, and with a flick of the wrist the whole thing turns into a laptop. 
Of course, in terms of weight, such a machine will be 2 times heavier than a laptop, and you also need to carry the keyboard and mouse with you. But, of course, this example deserves a place in the selection of the most unusual computer cases.
Making an iMac with your own hands
Apple computers are not cheap, and Lenovo all-in-one computers, although they cost less, are also more expensive than a desktop. But what if you want an all-in-one PC? You can tighten your belt and save up on an iMac, or you can just take the stuffing from a laptop with broken screen and a desktop monitor. A little double-sided tape, a couple of self-tapping screws - and we’ll meet new model iMac. 
For a complete ambience, all that is missing is a bitten apple, as well as a silver color. But this is not a problem either: a trip to the building materials store (for a can of silver) and the grocery store (for a kilogram of apples) can solve the problem. At the same time, vitamins into the body after a long winter. 
Another example of how to make a candy bar with your own hands. 
Second life of a cardboard box
In the era of the development of online stores, a huge amount of packaging containers in which purchases are delivered gradually accumulates in everyone’s home. Sometimes it’s a shame to throw away good boxes, and the space in the pantry quickly runs out. You can breathe a second life into the box by using it as a PC case. This is especially rational if the brand new hardware in it came from the store. 
This approach is very popular among the people; the Internet is replete with pictures showing such unusual computer cases. 
If you don’t have time to do handicrafts or if you forgot all the skills learned in labor lessons in elementary school immediately after graduating from school, you don’t even have to bother with scissors and tape. 
And that will do. And even like this: 
Subtle and tasteful
Sometimes unusual computer cases can pleasantly surprise you. Sometimes this is the fruit of careful work, and in terms of price they are comparable to factory models.
The production of such a case, made in the spirit of minimalism, probably cost several hundred rubles per plexiglass. And considering that all the parts were neatly fitted, the owner also spent more than one hour working on it. 
And this is actually a masterpiece, and making such a cool PC case definitely cost the craftsman a pretty penny. 
Poor fish
Effective heat dissipation and a stylish look rolled into one also deserve a place in the selection of unusual computer cases. We can only hope that the owner purchased the aquarium specifically for the PC, and the fish did not have to set off on a free voyage. 
By the way, if someone wants to repeat this step, they need to take into account that water cannot be poured as a liquid. For these purposes, synthetic or mineral oil, for example, transformer oil, is optimal. In any case, the liquid must be electrically inert.
Computer in a canister
Another example of using outdated containers, this time plastic. Such a machine would fit seamlessly into some fuel warehouse or car service center. There, such a strange computer case would not stand out against the background of the general situation. 
Cooling is never too much
This is probably the slogan that guided the owner of this strange computer case, made entirely of fans. But such a large number of turntables consume quite a lot; they probably require another power supply. And one can only imagine the noise that rises in the room when such a monster is turned on. 
Once and for all
This is exactly what you can call such an unusual computer case. Polyurethane foam is very difficult to remove from surfaces, and if any part fails, you will have to sweat to get to it. 
By the way, this is another example of recycling vegetable boxes.
For those who are tired of constant laptop overheating
It seems that the owner of this laptop is tired of constantly cleaning his computer from dust, regularly changing thermal paste and dealing with overheating. Otherwise, why else would there be a need to install a powerful water cooling system on a laptop. 
True, it is difficult to call such a design a laptop, because we are not talking about any mobility. That is why this masterpiece of “engineering” was included in the selection of the strangest computer cases.
Moreover, it is absolutely not necessary to buy an expensive top-end case - you can make it yourself. It just takes a little effort, experience and patience.
How to make your own transparent computer case.
The obvious advantage of a transparent computer case is its aesthetic component. Other advantages of a transparent case include:
- Multi-colored modern LED lighting.
- The ability to monitor the visual condition of PC components, including transistors and thermal paste.
- The unusual design will make your PC the main decoration of your room.
- You can make and upgrade it yourself!
In most cases, users complain about the following shortcomings:
- Too soiled.
- Pets regularly leave new scratches.
- Fragile.
- The price is several times higher than the cost of a regular case.
- Self-assembly requires skills in handling computer technology and equipment.
The largest case manufacturers have long brought to the market a line of transparent case models to suit every taste and budget. And the first problem is what material to choose.
Material
If you have already decided to buy a case with a transparent side panel, another dilemma arises - should you use tempered glass or acrylic (plexiglass)? Both materials have their advantages and disadvantages, so the choice can be difficult.
Acrylic body
Advantages:
- Less weight.
- Lower cost.
- Easier to disassemble.
Flaws:
- More scratches.
- At higher temperatures it may become deformed.
Strained glass
Advantages:
- More transparent.
- Easy to clean.
- Scratch resistant.
Flaws:
- It may shatter into pieces.
- Price.

Static electricity
You don't need to purchase anything or take any additional steps to prevent static electricity damage when working with PC components. A few simple tips will help you avoid danger without any additional effort.
- Before you begin, avoid wearing socks on the carpet, and also remove all woolen items - such materials can accumulate static electricity.
- While working on your computer, leave it connected to a grounded (three-prong) outlet. Be sure to turn off the mains completely by using the main switch on the power supply (on the back of the case) and not Power button, which you click every day.
- Before touching any internal components, touch a metal part of the PC case with your hand. This will ground you, neutralizing static charge. After this, you can safely get to work without worrying about static electricity.
- Periodically touch metal parts of the chassis to neutralize static charges and remain grounded.
- Never forget about static electricity. Especially if you periodically come into contact with any individual components. For example, if you need to replace a video card or bracket random access memory, be sure to ground yourself.
- Professional computer technicians recommend wearing an antistatic wrist strap. To use it, simply place the strap on your wrist and secure it to your PC case. This will ensure constant case contact and grounding, allowing both hands to be used inside the computer.
An antistatic mat also provides complete protection, but the tips described above are more than enough. Even an anti-static wrist strap would be overkill for the average PC user. If you have assembled/disassembled your PC many times and never encountered static electricity, consider yourself very lucky.

Order inside
Be sure to make sure that you know where the wires should be laid and how to secure the components. Pay special attention to the second one - improper use (planting in a nest, temperature regime, dust) components, be it RAM or a video card, will certainly lead to PC failure. The main problem inside is the wires connecting the power supply to the rest of the PC. Once you are sure that all components that require separate power are connected, tie the remaining wires together with a plastic tie or electrical tape. In most cases, they can be placed neatly along the edge of the motherboard. The case is cooled in such a way that air flows through all its parts, after which a lot of dust settles there. It clogs the paths and air communications of the entire system, which also leads to overheating and breakdown of expensive components. Therefore, it is necessary to perform regular cleaning, even at home. Following our advice on static electricity, remove one side panel and thoroughly vacuum the motherboard.
Be extremely careful not to snag the processor or RAM!
Price
The cost of a transparent case ranges from several tens to several hundred US dollars. If you decide to buy a case with a clear cover, we recommend Antec's time-tested products. The optimal case for the average user, Antec Nine Hundred Two V3, has the following characteristics:
- Beautiful on the outside.
- Lots of ventilation.
- Quite transparent side window. It also has room for an additional 120mm fan.
- Offers multiple drive bays (including one 2.5-inch bay) and 8 expansion slots.
- The power supply is located at the bottom.
- Huge fan for maximum circulation.
- Rotation speed controls for each front fan.
- Rear panel control unit for top and rear fans.
- Built-in removable air filters.
As for the shortcomings, users most often complained about:
- Limited small holes for cable routing and rubber grommets for improved appearance wiring.
- Too many drive bays - they eat up most of the internal space. Some long video cards do not fit.
You can now buy such a case for about $140 on Amazon or the manufacturer’s website.

What to look for when purchasing
Most technicians pay attention to the following characteristics:
- Connecting a processor cooler - allows you to replace the processor or cooler without disassembling the entire motherboard.
- Front panel connection - if you have many external devices, check the possibility quick access on the front panel of the case.
- Fans and Airflow – The more fans you have in your computer, the better the airflow will be.
- Dust filters – a computer clogged with dust, pet hair and tobacco debris will overheat and fail faster. especially considering the transparent body.
- Soundproofing – Special cases provide quiet operation, often using sound-absorbing materials inside the housing panels.
- Water Cooling Support – With the use of sealed all-in-one refrigerators, liquid cooling is more efficient than ever.
- Tempered glass body - gorgeous but fragile - handle with care!
- Integrated lighting – customizable RGB lighting.

How to make a transparent case with your own hands
The first step in creating a transparent PC case with your own hands is to compile a list of necessary materials and equipment:
- 1x1.5 meters of ordinary plexiglass 4 mm..
- 60x15 cm. Black plexiglass 3 mm.
Computer components:
- Motherboard (Intel H67).
- CPU (Intel G2030).
- Cooling fan for CPU (Zalman).
- Power supply (Slim Seasonic 250 W).
- HDD 320 GB.
- Fan for the case.
- 2 switches (Power On/Off and Reset).
- LED Strip Light.
Tools and peripherals:
- Bolts and nuts (120 or so).
- Drill, set of drills.
- Saw, a special blade for metal - best suited for cutting plastic.
- Electric drill.
- Wires for LEDs.
- Fan.
- Thermoplastic adhesive.
- Tin/aluminum and metal scissors (for attaching the hard drive).
- Engraver.
- Clamps.
- Aluminum corners.
- Gloves.
- Calipers.

Follow the instructions and you can easily make a transparent case yourself:

That's all. Assembly complete! In general, the whole job may take a couple of days, but the result is worth it. The body itself is very quiet (plexiglass is an excellent insulating material), so you can enjoy watching movies, surfing the Internet and listening to music to the fullest. What material will be best as a side transparent panel the case of your PC is up to you to decide. Different options have their pros and cons. To summarize, we can conclude that tempered glass is still a little more practical. Despite its weight and fragility, it provides a clearer view of your PC's internals.
 Order 343 mail. Order by Russian post. Consequences of failure to appear in court when summoned
 How to put a password on a folder on a Windows computer without and with programs
 Pluton – Free Bootstrap HTML5 One Page Template
 History of ZX Spectrum: Myths and reality New Spectrum
 Voice assistant Siri from Apple Siri functions on iPhone 6s
 How to roll back to a previous version of iOS?
 Unlock iPad in four days