Page numbering in Word is landscape orientation. How to create page numbering in Word. How to quickly number pages in Word automatically
The creation of large documents, books, diplomas, term papers, instructions is inextricably linked with page numbering. It's worth noting that numbering standards can vary dramatically.
If in fiction, a designer can afford ornate numbers and place them anywhere on the page, then in term papers or graduation projects, one must adhere to the rules of design, otherwise, even a brilliantly written work will not even be accepted for consideration.
In Word, you can insert page numbers in several places:
- at the top of the page;
- at the bottom of the page;
- in the margins of the page.
How to enable numbering at the top of the page
- From the “Insert” menu, select “Header and Footer”.
- From the drop-down menu, you are interested in the “Page Number” command.
- Then in the “Page Numbers” menu window, use the “Top of Page” command.
- In the menu that opens, you can select a page numbering option from the template library and click on it with the left mouse button.
How to enable numbering at the bottom of the page
Similar to the case described in paragraph 1, it happens automatic numbering at the bottom of the page.
- Open the “Insert” function.
- In the menu ribbon, select the “Header and Footer” command.
- In the “Page Number” group, in the menu, use the “Bottom of Page” command.
- And at the end of the algorithm, click on the number placement template.
How to enable numbering in page margins
Placing the page number in the margins is no different from any other placement.
- In the main menu, select “Insert”.
- In the command ribbon that opens, click on the “Page number” line.
- In the drop-down list, use item number three, “In the margins of the page.”
- In conclusion, you should choose a template that meets your requirements.
Change page numbering in Word
By default, Word uses page numbering from first to last. In most cases, this method is acceptable, yet it is not for nothing that it is made by default, but in cases where we are dealing with coursework, or setting page numbers in a book, such numbering becomes useless.
In this section, we will look in detail at how to change the page numbering for different cases.
How to number pages without a title page
Coursework, essay, diploma and similar documents that have a title page do not allow numbering on the first page.
The title page is not numbered, and although it is part of the book, it is not numbered.
Let's consider an example in which you need to remove the numbering of the title page in a Word document:

As a result of these actions, the numbering of the document will start from zero, and then on the first page “0” will be hidden by a special footer. The second page will accordingly receive the number “1” and will continue further, automatically.
How to number pages starting from any page (from 3 and up)
In order to be able to number pages starting from the second, third or any other, you should perform the following steps.
- Place the cursor at the end of the first page.
- Click on the “Page Layout” menu item.
- Select the “Breaks” function and use the “next page” command. Go to the end of the second page and repeat your steps.
As a result, three pages with the number “1” will appear in the document.
- Next, in the “Insert” menu, access the “Page Number” line.
- In the window that opens, click on the line “Page Number Format”.
- The next step is to check the box in the “Start with” line, and set the cell to “0”.
- Next, on the first and second pages, set “Special header and footer on the first page.”
- As a result of our actions, we removed the numbers from the first and second pages, and our third page begins with the number “1”.
How to put even and odd page numbers
Let's give an example of the implementation of book page numbering, where there will be even numbering on one side and odd numbering on the other.
This format is used because two pages will be printed on one sheet at once: the first and second. In order not to get confused in page numbers, it is more correct to set even and odd numbering.
Page numbers will need to be placed on the first and second pages separately. Let's start from the first page:
- Let's go to the "Insert" menu.
- Select the number layout format (in my case I use Simple Number 3)
For the second page do the following:
- Let's go to the "Insert" menu.
- Let's go to the "Header and Footers" block and select "Page Number".
- Depending on the planned place for the number, we activate “Top of the page” or “Bottom of the page”.
- Select the number layout format (in my case I use Simple Number 1).
- In the construct menu that opens, click on the “Options” item.
- Select the line “Even and odd headers and footers for different pages" and check the box.
At this point, the page layout is completed, and the numbering will change to even and odd, as shown in the screenshot below.
How to add numbering like “Page 10 of 250”
- We carry out the document numbering procedure.
- Use the mouse cursor to highlight the number of the first page of the document.
- Press the key combination “Alt + F9”
- Instead of “1” the inscription will appear
- Add “\250” to the end.
- Press Enter.
As a result, we get numbering in the “X\250” format throughout the document. Where X is the number of the current page of the document, and 250 is the number of pages in the document.
Another option for creating the numbering “X out of 250” is as follows.
- In the main editor menu, click on the “Insert” menu item.
- In the set of commands that opens, activate the “Page Number” command.
- In the window that opens, select one of the suggested locations for the page number.
- In the templates provided to choose from, we find the option “Page X from Y).
- Your page will be numbered as follows: Page 1 of 5.
- Press the keyboard shortcut “Ctrl F9”.
- The page numbering will look like “X of 250”. Where X is the current page number, and 250 is the number of pages in the document.
What is continuous pagination?
When working with complex documents containing a large number of sections, there is a need to number the page, both as part of the section and as the page of the entire document as a whole. In this case, the numbering that runs through the entire document is called continuous.
Continuous numbering differs from regular numbering by a certain number of pages. To correct the situation, use the hotkeys “Alt” + “F9”. The following is the algorithm for creating continuous numbering.
Let's say the difference between continuous and regular numbering is 12 pages. To correct the value of continuous numbering to one that corresponds to reality, you should:
- Select a continuous numbering number.
- Press the key combination “Alt + F9”. The page numbering will change to
- Press the key combination “Ctrl + F9”. One more will be added to the formula braces. { { }
- Before the brackets we put an equal sign, and after -10 and press “Ctrl + F9”. . (= ( -10 )
As a result, continuous numbering will increase by 10 points.
How to make page numbers in headers and footers
You should have become acquainted with headers and footers in the article “, so it’s better to follow the link and read the material.
If you are already familiar with headers and footers, let's continue.
- We move the cursor over the virtual line located above the first line in our document and double-click with the left mouse button.
- As a result, the header will appear and the designer will open in the command ribbon.
- Select and activate the “Page Number” command. This can be done by left-clicking on the selected function.
- In the menu that opens, select the item that corresponds to our desire regarding the placement of the numbering of our document and click on it with the left mouse button.
This way we can assign pagination to the already created footer.
Number with Roman numerals
- Double-click on the header or footer and the designer will open in the menu ribbon.
- In the ribbon, find the “Page Number” menu item and open it.
- In the window that opens, go to the “Page Number Format” line.
- In the “Number Format” block, click on the drop-down list and select Roman numerals.
- Click “Ok” with the left mouse button.
How to remove page numbering
- To remove page numbering, double-click on any page number.
- In the construct that opens, select the “Page numbering” line.
- In the window that opens, hover the mouse cursor over the “Delete numbering” command and press the left mouse button.
There is another, more classic way to remove page numbering.
- In the main menu, click on the “Insert” command.
- Among the attached commands to choose from, you should stop at “Page number”.
Adding pagination
To add pagination, select the “Insert” tab in the ribbon menu and go to the “Header and Footer” area. Using the “Page Number” button, we select the format for displaying the numbering - at the bottom, at the top of the page or in the margins - and use one of the proposed layout options.
Through the same menu you can remove page numbering if it is not needed. In addition, advanced settings are available here in the “Page Number Format” option. Here you can choose to display numbers or choose letters or Roman numerals instead. You can include chapter numbering. And most importantly, you can specify from what date the page numbering will begin, which is important if you are supplementing previously printed material or using division into sections in the document.

Numbering on individual pages
It often happens that not all pages require numbering. A classic example is the title page. But sometimes documents are diluted with illustrations, where numbering is also not needed. All this is available in the Word editor.
Let's create a title page for our document. And let's add page numbering, say, at the bottom of the page. By default, the page number is added everywhere, and to remove it from the title page, go to the “Design” menu in the “Options” area and fill in the “Special header for the first page” checkbox. The number of the first page is no longer displayed, but on all subsequent pages it is, starting with the number two.

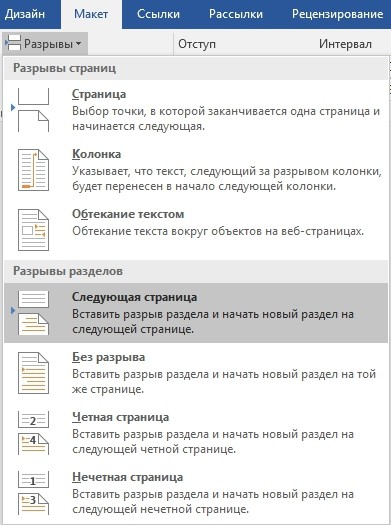
Now let's add a couple of pages with illustrations in the middle of the document. Page numbering has also been added here. To remove it, we use division of the document into sections. To do this, place the cursor at the end of the first part with the text and select “Layout” – “Breaks” – “Next Page” from the menu. This command adds a section break.
By default, page numbering continues in the second section. And if we checked the “Special footer for the first page” checkbox, then the first page of the new section will also not be numbered. If we have only one page with an illustration, then these actions will be quite enough. If there are several such pages, then at the end of the last page with illustrations we will create a new section, and in the section with pictures we will simply remove the numbering.
Note: To prevent the numbering from being removed from all sections, it is necessary to remove the connection between sections - to do this, select the footer in the corresponding section and, through the “Designer” menu in the “Transitions” area, click the “Same as in the previous section” button (it should become inactive).

Our illustration pages are no longer numbered. What about the second part of the text? In order to return the number to the first page of this section, double-click the mouse to select the header and footer area and deactivate the “Special footer for the first page” checkbox.
Finally, if we want pages with illustrations to not count towards total number pages, then go to the “Page Number Format” menu, select the “start with” option and enter the specific number from which the numbering of the section we have chosen should begin. Thus, in our example, the first section ended on the third page, the second section with pictures was not numbered, and the third section began with the number four.
Whenever you are preparing any important documents, such as legal papers, or writing a graduation document as a student qualifying work or a regular coursework, you inevitably face a problem: how to number sheets in Word in accordance with the official requirements that are presented to you in accordance with the approved norms and rules.
This task is solved quite simply; in just two or three minutes you will already know how to number pages in Word, and it absolutely does not matter what year it was produced.
It should be noted that the procedure for entering numbers in versions of Word before 2007 is somewhat different from those in modern versions of the program.
How to number sheets in Word 2007 and later
Continuous numbering
In this version of the utility, the so-called continuous numbering. This word means that if you do not set the settings you need manually, then numbers will be entered starting from the first sheet and then in ascending order. How is continuous numbering done? Go through the following steps in sequence:

Sometimes situations arise when you do not need all the numbers in order, but need to start numbering, for example, with the number two or three. What should you do in this case?
To make numbering out of order, repeat steps 1 and 2 of the above list. Then find the item in the drop-down menu called “Page Number Format” and click on it. You will be presented with a settings window in which you will need to find the phrase “Start with” and set a number that will be the starting number of your pages.
Not knowing how to prevent numbers from being placed on the title page is a common difficulty that inexperienced Word users have. Fortunately, this problem can be solved quite easily. Follow the steps below step by step:

The result of your actions will be that the number indicating sheet 1 of your document should disappear, and the numbering will begin on the next page with the number two.
How to number sheets in Word 2003
Numbering in order
Placing numbers in older versions of the Word program it is performed a little differently than in later versions. To make numbering, use the following algorithm:
- Check the box next to “Number on first page.”
When, if you need the first sheet to have something other than the number one, and any other number, for example, two or ten, then follow sequentially steps 1 and 2 from the above algorithm of actions, then find the tab in the window that opens in front of you called “Format” and go to it. Find the item called “Page Numbering” and set the number from which you need to start counting in your document.
Numbering without title page
To number not all pages and leave the title page without a number, follow these steps:
- At the top of the software window, find a menu item called “Insert” and click on it using the left button of your mouse.
- Find the item called “Page Numbers” and click on it.
- You will see a window in front of you where you will need to set several settings:
- "Position". Thanks to this point, you can tell the program where it should put the numbers: up or in bottom part pages.
- "Alignment". Determines the exact position of the number. Valid options: center, right, left, outside or inside.
- Do not check the box next to the phrase “Number on the first page.” As a result, the top sheet will remain without a number, and the next one in order will be numbered two.
Hello, friends! In this Cheat Sheet we will find out how to enable page numbering in Word. We will talk, as before, about latest version program - 2016. In this article you will get answers to the questions:
How to make continuous page numbering in Word
The easiest way to insert page numbering in Word is end-to-end, when the pages are “recounted” from the first to the last in order. We do this one-two-three times (Fig. 1):
- Go to the tab "Insert".
- Finding the section "Header and footer", and in it the line "Page number".

All pages of a Word document are numbered automatically. To consolidate the operations performed in the document, simply close the header and footer window (green arrow in Fig. 1) or, even simpler, double-click with the left mouse button on any piece of text outside the header and footer.
How to insert numbering in Word, starting from the second page
Quite often it becomes necessary to start numbering pages from the second, leaving the first under the title page. Depending on the design standards or the wishes of the author, the numbering may begin with the number 1 or 2. Let's look at both of these cases.
To perform this operation, go to the footer control panel "Constructor", click on the section "Page number", in the menu that opens, select "Page Number Format" and in the line "begin with…" put zero. Close this window, select the numbering position (top/bottom), and design style. After this, a zero number will appear on our title page, the next one after it will be marked with a number "1"(Fig. 2).

To get rid of the completely unnecessary zero, go to the section "Options" all the same panel "Constructor" and put a mark "Special footer for the first page". After this, remove the zero with the key « Backspace» or « Delete» . On the second page we will have the number 1 , and all subsequent ones will be numbered in order.
If the system of starting from the number is selected for document execution "2", then at the third step in "Page Number Format" in the line "begin with" put one. Next, we repeat all the steps already described. As a result, the numbering of your document will start from the second page and number "two". The first number will indicate the title.
How to set numbering in Word from the third or any other pages
Except on the title, in abstracts, coursework, reports or e-books It is not customary to put the number in the table of contents. Then it becomes necessary to start numbering pages from the third, fourth or further pages. To perform this operation, you will need to separate pages that do not need to be numbered into a separate section and follow 8 steps in succession.
So, let's say we are not going to put numbers on the first page - the title and the second - the table of contents. But at the same time we want to take them into account in the general numbering, that is, start the listing from the number "3". Our actions in this case will be as follows:
- On the tab "Home" turn on "Hidden formatting marks"(for ease of use). The same action can be performed using hotkeys : Ctrl+ Shift+8
- Place the cursor at the beginning of the third page (or the one from which you are going to start numbering).
- On the tab "Layout" In chapter "Page settings" select a team "Break", and in the window that opens - the line "Next page".
- On the page after the break (in this example it is the third), make two clicks on the header and footer area (free field above or below the text) - a panel will open "Constructor".
- In chapter "Transitions" disable the button "Like the previous one" alternately for header and footer. The link to be broken corresponds to the active (unshaded) footer button.
- In chapter "Header and footer" in the opening window "Page Number Format" in the line "begin with…" put a number "3" and click “OK”.
- In line "Current position" select the page numbering style.
- To consolidate all completed actions, you need to either close the tab "Constructor", or simply double-click on any part of the main text.
I will not present to your attention a lot of screenshots. If this multi-move seems a little difficult for you to understand, then just watch the short video instruction.
How to set page numbers in Word in the “X from Y” format
This method is used when you need to display the page number against the background of their total number in the document. This task is solved quite simply, since the collection of numbering styles contains ready-made template similar format. So, here is the chain of necessary actions:
- open a tab "Insert";
- In chapter "Header and footer" click on the button "Page number";
- in the drop-down menu, select the upper or lower numbering position, but not "On the fields";
- in the style collection we find the format "pageX fromY» ;
- consolidate the actions and move on to the main text by closing the panel "Header and footer" or double-click the left mouse button on the text (Fig. 3).

As you can see, this method is simple and easy, but I want to immediately warn my reader that it has one drawback. When numbering pages in this way, it will no longer be possible to insert any other information into the headers and footers. If there is such a need, then you need to add page numbers like “X from Y” using another method - using field codes. We will not discuss the topic of codes within the framework of this material, since it is quite extensive. One of the future articles will be devoted to it.
We also haven’t figured out everything about numbering yet. In the next “Crib Sheet” we will look at all the remaining questions and close this topic.
Goodbye friends! Your guide to WORD 2016 GALANT.
 Order 343 mail. Order by Russian post. Consequences of failure to appear in court when summoned
 How to put a password on a folder on a Windows computer without and with programs
 Pluton – Free Bootstrap HTML5 One Page Template
 History of ZX Spectrum: Myths and reality New Spectrum
 Voice assistant Siri from Apple Siri functions on iPhone 6s
 How to roll back to a previous version of iOS?
 Unlock iPad in four days