Operating system Linux mint 18
Linux Mint(Linux Mint) is a free operating system that today is breaking all conceivable and unimaginable records of popularity all over the world. The process of using the operating system has become even simpler and more convenient even for an untrained user who has just begun to learn the basics of computer literacy or has simply decided to switch to another OS. Linux Mint is based on another popular OS - Ubuntu Linux, which can also be downloaded for free.
The popularity of this OS version is high not only among Russian speaking users, and throughout the world, it is among the TOP 3 most famous and popular free Linux-oriented distributions.
A distinctive feature of this distribution is that all Linux programs that run on Ubuntu can be used on Mint without any problems. Compatibility is almost one hundred percent.
Regarding system requirements
, then there is no need to worry - if you have more than 512 megabytes of RAM and HDD from 20 gigabytes, then you can safely download Linux and install it on your laptop or Personal Computer(PC).

This is an undeniable plus for users, because on the Internet and special repositories (official databases with software) there are many various programs: only in official source there are over thirty thousand of them, and if you add unofficial ones, then the numbers simply go off scale.
This compatibility extends to the entire set of tips, algorithms for solving problems, answers to questions about the operation of utilities, which can be found on various portals and specialized forums, as well as in communities programs for Linux and numerous FAQ sections.
It is worth noting that more than one hundred forty-three million people live in the Russian Federation, and many of them use this particular version, so the audience we are talking about is truly impressive. Based on this, it will not be difficult to configure at your own discretion, and if difficulties arise, many will be able to tell you what and how to do.
Let us remind you that the basis of the free version is Ubuntu, so the latter’s new products come out much earlier, and the releases of the first OS are placed taking into account previously identified errors and defects. Thus, users are offered an already updated, better and more thoughtful version of the software.

The appearance and interface of Mint is strict and democratic, with well-thought-out logic and necessary functionality. We have our own developed applications, and not just those inherited from the “ancestor”.
Extra Bonus– this is the presence of audio and video codecs, which will allow you to immediately watch movies and listen to music without installing additional software.
A characteristic feature of Mint that sets it apart from its analogues that offer affordable software out of the box is its maximum ease of use for users of any level of computer literacy.
It’s not at all difficult to understand, and most importantly, it’s not at all time-consuming. Even those who are used to working with another operating system (Windows or MacOS), when switching to (in Russian), quickly adapt to its user-friendly interface, which is convenient and well-designed.
But simplicity does not mean the absence of complex functions for performing highly specialized tasks, and certainly does not affect the speed of working with complex projects. , as a representative of the UNIX family, is the carrier of a modern functional set of OS. This already includes various 3D effects when opening drop-down menus, etc., which very little use the computer's system resources.

The graphical shell can be any of the most common ones - Gnome, KDE4, Xfce, LXDE, etc.
In that version Linux Mint(in Russian), which you can download for free from our website, the Gnome desktop is used as the simplest and most undemanding system resources PC.
This distribution is aimed at users with diametrically opposed needs. It is suitable for beginners in working with computers, those who preferred this program to previous ones, as well as those who do not want to spend a long time installing the necessary software, since everything necessary is already installed. And if such a need arises, you can always deliver necessary software directly from the special package manager that is included in the distribution.
Linux Mint is an excellent distribution developed and supported by a community of users based on Ubuntu. Compared to Ubuntu, it contains more default software, such as many proprietary drivers, as well as its own software, which makes it easier to work with the system, for example, a program for Reserve copy or updates.
The Cinnamon shell is based on Gnome, but strives to be simpler for users, has a familiar appearance and widget support. Latest version Linux Mint 18.1 came out a few weeks ago. This release updates the Cinnamon version, software stack, updates Xeader, Xviewer, Xplayer and fixes several bugs. This article will cover setting up Linux Mint 18 Cinnamon after installation.
I have nothing against the Linux Mint logo and dark background, but it is more pleasant to work on the system when the desktop background is set to a beautiful image. So first of all, let's change the background. Open Menu -> Options -> Wallpapers:
Then go to the Serena tab and select the picture you like. On the images tab you can upload your own:

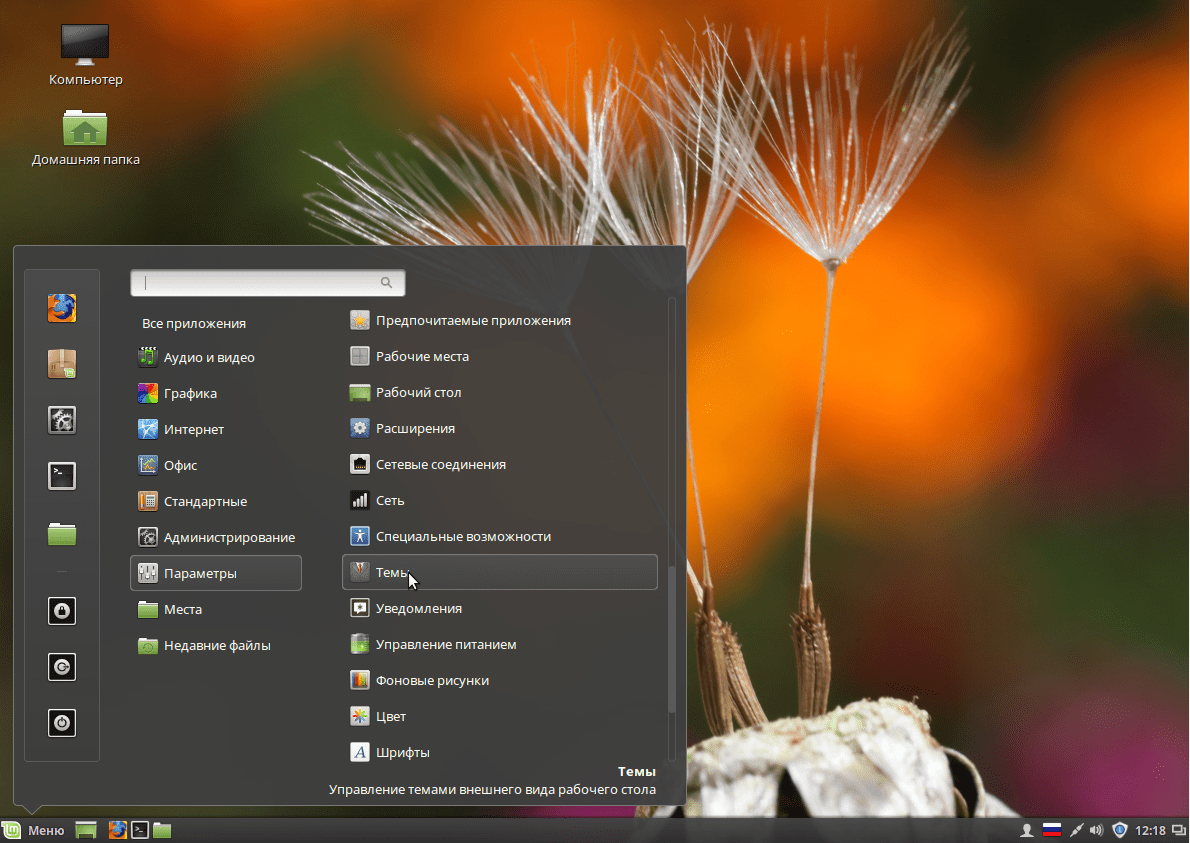
2. Theme
Mint 18 also added the Mint-Y theme. It is made in a modern flat style and looks quite beautiful. You can activate it in the settings. To do this, open Menu -> Options -> Themes and select values for all parameters Mint-Y:
Looks quite nice.

3. Add widgets
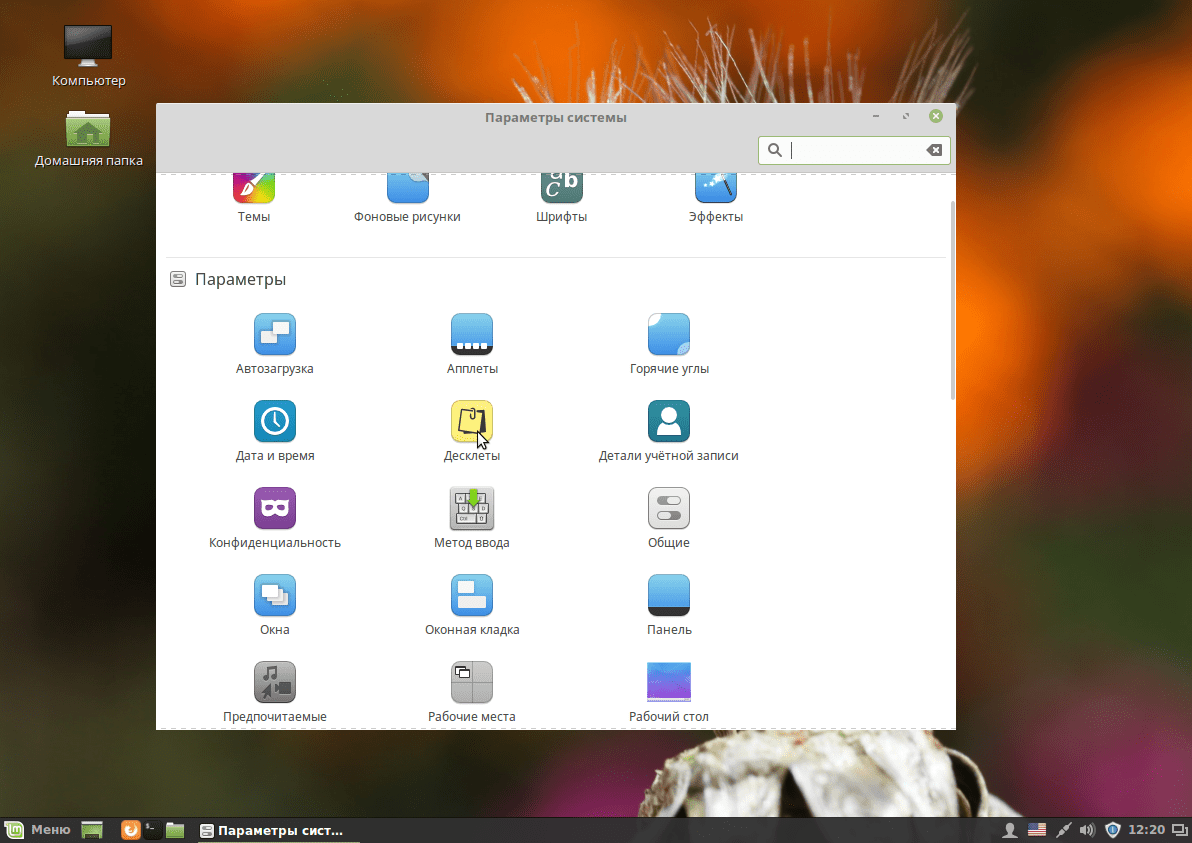
Cinnamon supports widgets, which are called desktops here. Return to the main menu of the Settings utility and select Desclets:
Here you can add the desired widget to your desktop using the button Add to desktop:

Or install additional widgets from the network:

4. Update your system
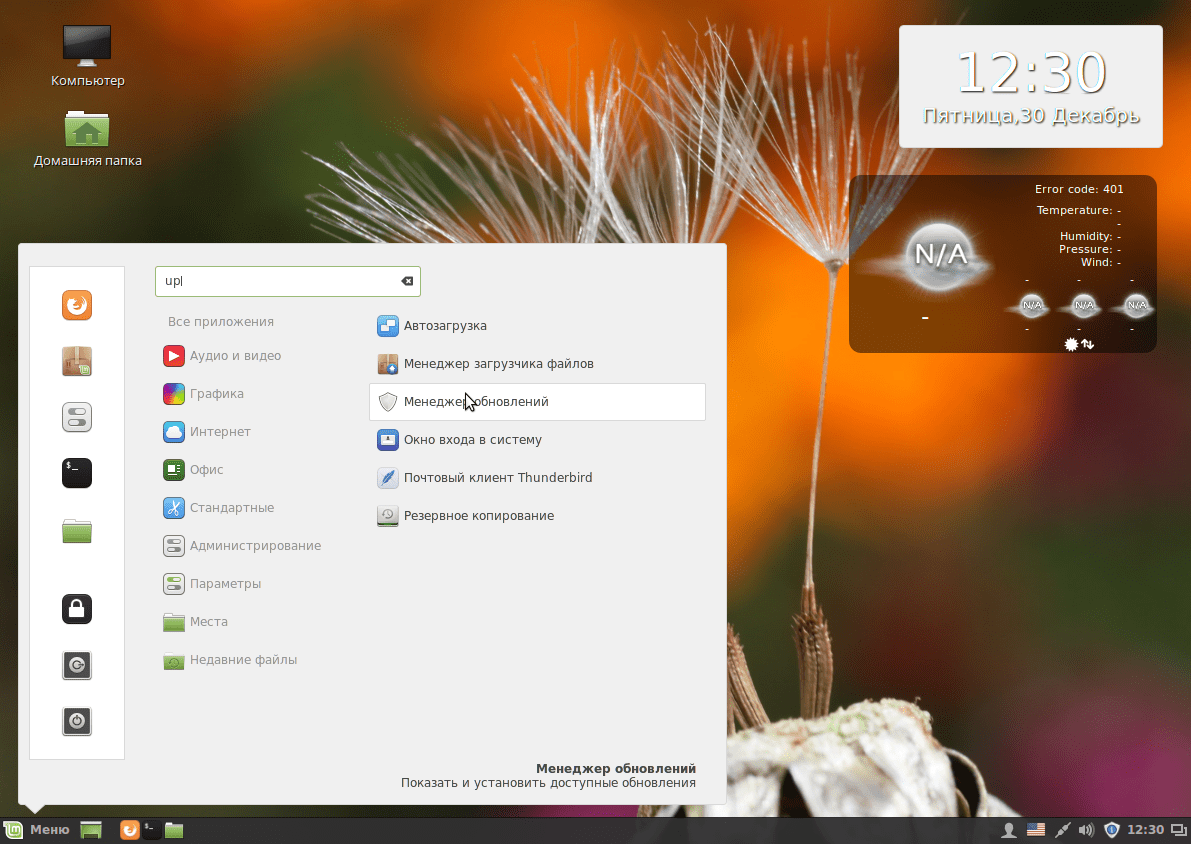
It is important to keep your system up to date. Linux Mint has a special update tool, run it from the main menu:
When you first start, the system will prompt you to choose which updates to install; it is recommended to leave it as is to get the new software:

You can then select the updates you want and click Install updates:

Most likely, you will need to do the procedure twice, since you may first need to update the update manager itself.

5. Installing codecs
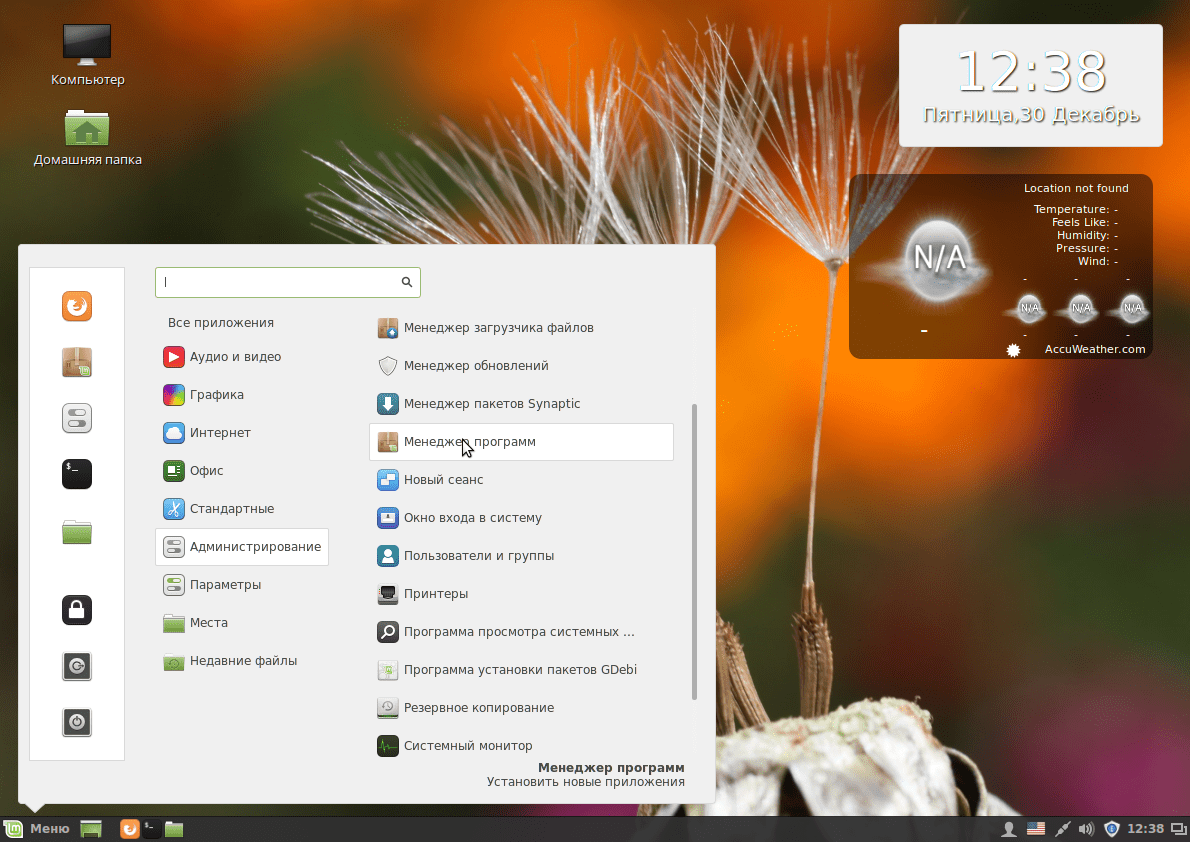
Previously, codecs were supplied with the distribution and there were no problems with this. But then the developers decided to remove them. But we can install linux mint codecs from official repositories. For this we have an application center:
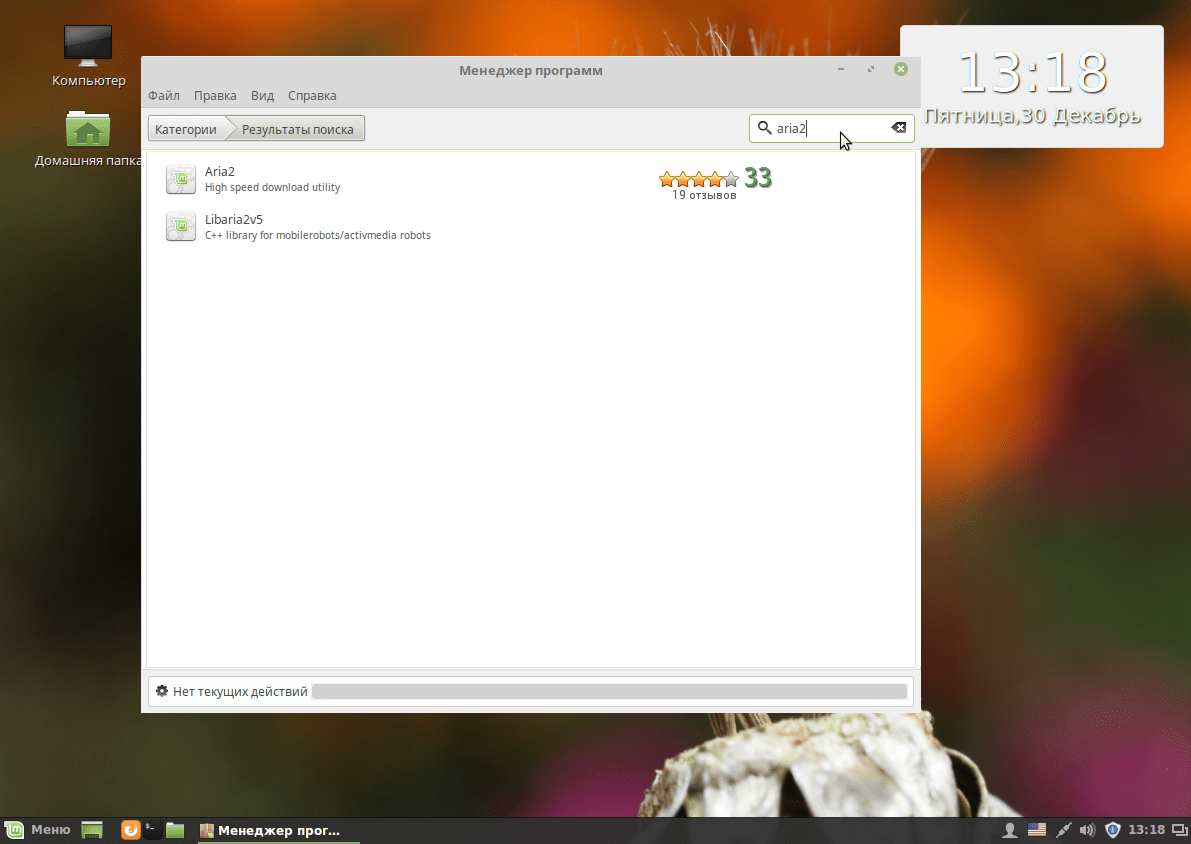
In the search, type mint-meta-codecs or just codecs, you will immediately see the package found, as well as its rating:

To open the package description window, double-click on it and then click Install for installation.
To install all available codecs, open a terminal and run the command:
sudo apt-get install gstreamer1.0-libav gstreamer1.0-plugins-ugly-amr gstreamer1.0-plugins-ugly libgstreamer-plugins-bad1.0-0 gstreamer1.0-plugins-bad-videoparsers gstreamer1.0-plugins- bad-faad gstreamer1.0-plugins-bad libdvdnav4 libdvdread4
6. Install drivers
The system already contains drivers for many peripheral devices, even if they are closed source, not all of them are. For example, drivers for a video card must be installed separately. Open the driver manager through the main menu:

When the program loads, select the drivers you want to install and click Apply changes. After installing the driver, you will need to restart your computer.

7. Installing programs
Despite the fact that the system already contains many of the programs you need, not everything is there. Everything you need can be installed through the application center. Skype communication program:

VLC media player:

Audio player Clementine:

Graphic editor Inkscape:

Torrent client qBittorrent:

Aria2 Download Manager:
Mail client Mozilla Thunderbird:

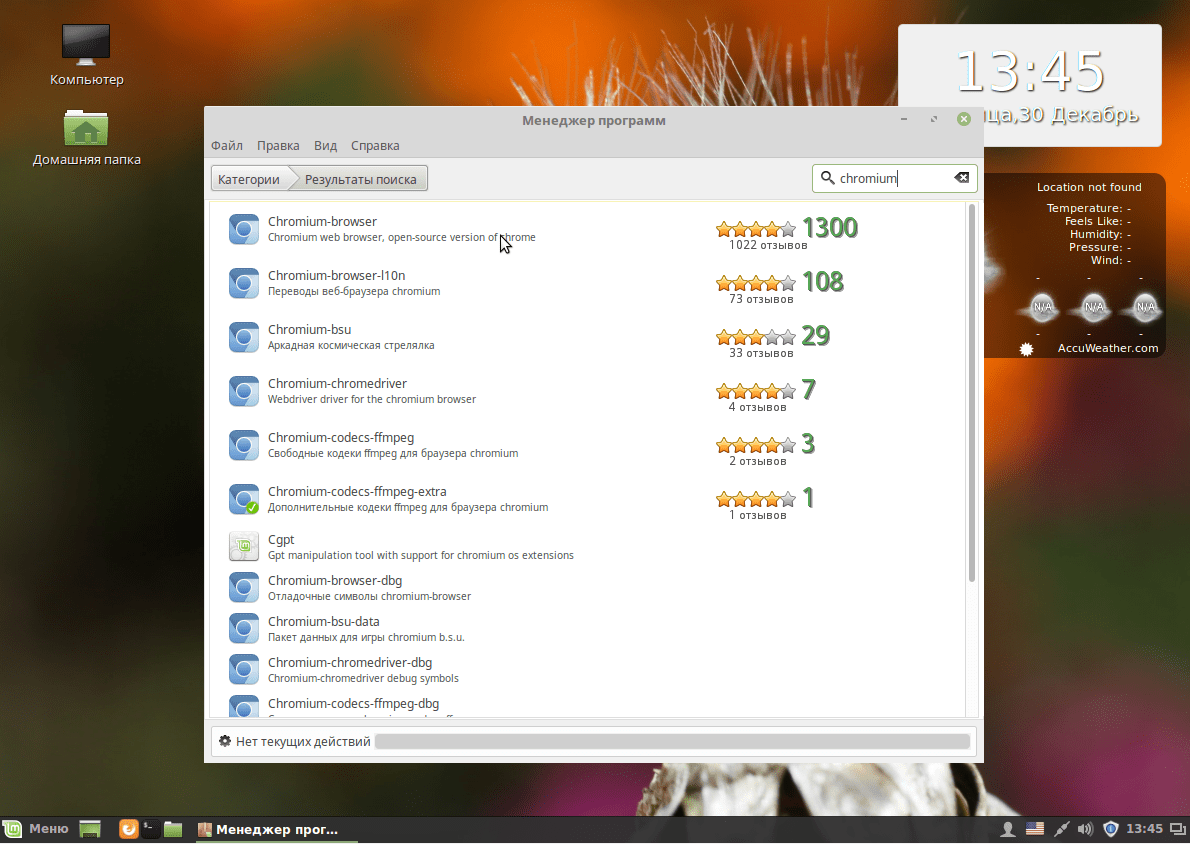
Chromium browser:
BleachBit system cleaning program:

You can find and install other popular programs in the section Favorites:

8. Installing Adobe Flash
Flash technologies are used less and less on websites, and are being replaced by HTML5, but many users still need a Flash player. To install it, use the following commands in the terminal:
sudo apt-get install pepperflashplugin-nonfree
$ sudo dpkg-reconfigure pepperflashplugin-nonfree
9. Install Java
Many programs require a Java machine to run. You can install it from the PPA repository. First add the repository:
sudo add-apt-repository ppa:webupd8team/java
$ sudo apt-get update
Then install the package:
sudo apt-get install oracle-java8-installer
10. System backup
Setting up Linux Mint 18 cinnamon after installation should include backup. While the system is still clean, you can create backup copy, so that you can quickly restore it later. To do this, you can use the TimeShift utility. First install it from the PPA:
sudo apt-add-repository -y ppa:teejee2008/ppa
$ sudo apt-get update
$ sudo apt-get install timeshift
Then launch the program from the main menu, then configure the backup frequency and create your first copy using the button Create:

Now you can restore the system if necessary.
conclusions
Even though Linux Mint contains more improvements compared to Ubuntu, it also requires customization of linux mint 18 after installation. We have looked at everything in sufficient detail so that even a beginner can figure out how to prepare their system for everyday use. If you have any questions, ask in the comments!
The head of the development team, Clement Lefebvre, approved the release of images to a wider audience on July 2, 2017. Curious that the way out new version Mint coincided with updates to the core desktop environments Cinnamon and MATE, as well as the alternatives KDE and Xfce.
Clement Lefebvre commented on the release:
Linux Mint 18.2 - long-term version technical support until 2021. The distribution comes with updated software and includes improvements and new features that make your desktop even more convenient to use.
Linux Mint 18.2 comes with the latest versions of Cinnamon 3.4, MATE 1.18, KDE Plasma 5.8 LTS and Xfce 4.12 desktop shells. The distribution is based on the code Ubuntu based 16.04 LTS and kernel Linux versions 4.8. LightDM is used as an authorization manager for Cinnamon. Software Sources, Update Manager and XApps have received numerous improvements.
Now that work on Linux Mint 18.2 (Sonya) is complete, development of the next major version of Linux Mint 18.3 begins. Clement Lefebvre invites developers to think about new interesting features and projects that they would like to implement in the upcoming release.
In the update manager, select the “Check for updates” button to start checking the new version of mintupdate and mint-upgrade-info. If updates are available for these packages, install them.
Start the system update by selecting Edit > Update to "Linux Mint 18.2 Sonya".
Follow the instructions on the screen.
After the system update is complete, restart your computer.
Additional Information:
- Although Linux Mint 18.2 has a new kernel, this update does not change the kernel on your behalf. This decision must be made by the user.
- The same goes for choosing a graphics manager or choosing software. Brasero will not be uninstalled and MDM will not be switched to LightDM on your behalf. You can apply these changes yourself, but this is not required.
- It is recommended to disable the screensaver before updating. If the screensaver activates during the update and you are unable to log in, switch to the console using CTRL + ALT + F1 , log in and enter killall cinnamon-screensaver(or killall mate-screensaver in MATE). Use CTRL + ALT + F7 or CTRL + ALT + F8 to return to the session.
How to switch from MDM to LightDM
First install LightDM by typing the following commands in a terminal:
Apt install slick-greeter lightdm-settings
When asked to choose a default display manager, select LightDM.
Then remove MDM and reboot by entering the following commands into the terminal:
apt remove mdm
In this article we will look at the process Linux installations Mint. It is a community-developed Linux distribution based on Ubuntu. But there is also an edition based on Debian (LMDE).
The main goal is to provide the user with a "modern, elegant and user-friendly operating system that is both powerful and easy to use." Linux Mint provides full support for a variety of media formats, includes some proprietary programs, and comes bundled with a rich set of open source applications.
The founder of the project is Clement Lefebvre; the development team and the user community are also actively involved in the development.
Preparing for installation
Step 1. Download the image
You can download the distribution kit on the official website. Select the edition that suits you and download it. In this tutorial I will use Linux Mint Cinnamon
Step 2. Burn the image
Now we need to create a boot device. For such a device, I recommend you use USB flash drive. You can make such a flash drive in Linux using the program, or use the command dd:
$sudo dd if=~/linuxmint-18.3-cinnamon-64bit.iso of=/dev/sdX1
Where " sdX" is your flash drive, and " 1 " is the first section on it.
For creating bootable flash drive Under Windows OS I recommend using the Rufus program.
Step 3. BIOS setup
I will not go into detail at this stage, since there are plenty of instructions on the Internet (for example,). Just restart your PC. Sign in BIOS menu and put your flash drive first in the list.
Linux Mint 18.3 installation process
Step 4: Download
Below are the screenshots when booting from BIOS and UEFI. In both cases, select the first option.
Step 5: Run the installer
After loading the desktop, look for the “ Install Linux Mint" and click on it 2 times.
Step 6. Welcome and system language
After launching the installer, in the right menu you will need to select the language that will be used during installation and subsequently in the system itself. To go to the next step, click " Continue»
Step 7. Install additional software
Here you are asked to install various additional software, such as drivers, Flash, and other programs. Some software is proprietary. Bet at your own discretion. Personally, I usually refuse and then put in my hands only what I need.
Step 8. Partitioning the hard drive
Here you have to choose the installation method. But I will be breaking the disk with my hands, so I chose " Another variant».
A window for setting up partitions will appear in front of you. First, we have to create a new partition table if we install Linux completely (If you install it next to Windows, then skip this step). To create a blank table, click " New partition table...».
You will be notified that all partitions on your hard drive will be destroyed. If you agree, then click " Continue».
To create a new section, click on " + " in the lower left corner.
If you are installing Linux on computers with UEFI, then you need to create an ESP partition. How to set it up is shown in the screenshot below.
You can also create a swap partition. It is done in the same way as the others, but in the paragraph “ Use as» specify « swap partition" It is needed for hibernation, and is also used when there is a lack of RAM. You can specify the size you want. Previously, 2 GB was enough for me. Now I'm using a swap file, if you're interested, I'll write an article about it. So, decide for yourself whether to use a swap partition or not. I went straight to creating the root partition. The system itself will be installed on it.
You can also create a home partition, then if you reinstall the OS, all data on it will be saved. If you still decide to make it, then I recommend allocating the most memory for it, since this is where all your personal information will be stored.
This is what my disk partitioning scheme looks like (I remind you that an ESP(efi) partition is created only when installing the OS in UEFI mode).
If you still do not create a swap partition, you will be notified about this and will be offered to go back and repartition the disk. If you are sure that you do not need it, then just click “ Continue».
You will now be shown all the changes you have made. If you are satisfied with everything, then click “ Continue».
If you install the system in UEFI mode, and the computer has other operating systems installed in BIOS compatibility mode, the installer will warn you about this. If you continue, you will lose the ability to run OSes installed in BIOS compatibility mode. If you have other OSes, then you should stop the installation and deal with the problem. If there are no other operating systems, then feel free to click “ Continue».
Step 9: Finding a Location
Step 10: Keyboard Layout
Now you need to select the keyboard layout you need from the list. You can leave what is specified according to the standard. Or you can try to determine it by clicking on the " Define keyboard layout».
Step 11: Create a user
In this window you need to indicate your full name and the name that will be used for the user (you can specify the same thing), computer name (you can specify whichever you want). You also need to set a password for your user. Be sure to remember it! If you do not want to enter a password after each system boot, then click “”. If you use a password, you can install encryption on your home folder. Do this at your own discretion.
Step 14. Login
After reboot, if you did not select the " Login automatically", you will need to enter a password.
Video with the installation process:
conclusions
In this article, we examined in detail the installation process of the Linux Mint 18.3 distribution. After installation is complete, if required, you can customize the system for yourself. If you have any questions, ask in the comments!
Linux Mint- an open source project that provides a completely free and easy-to-use operating system based on one of the most popular Linux distributions - Ubuntu .
Linux Mint includes a large number of applications to perform common everyday tasks.
The best way to describe Mint is as a virtual container in which you can install the Cinnamon and MATE desktop environments on top of a stable Ubuntu base, and add additional functions and built-in applications.
Linux Mint is a very user-friendly Linux distribution that is used by hundreds of thousands of users, especially those who are not comfortable with the native Unity interface.
Linux Mint Review
Distributed as 32-bit and 64-bit Live DVDs with versions of the Cinnamon, MATE, Xfce shells
The project has separate versions with Cinnamon, MATE, Xfce environments, each of which is available as bootable Live DVD ISO images that can be deployed on both 64-bit and 32-bit architectures. Users can also burn ISO images to USB drives or clean DVDs and download Linux Mint without installation.
Bootable media boots in 10 seconds, but experienced users can press a separate key to run the test random access memory or to boot the operating system from a local disk.
A similar bootloader implemented in Ubuntu is used in Linux Mint, only it has its own distribution logo. It should be mentioned that Cinnamon and MATE environments are created Linux developers Mint.
Two graphical environments and numerous useful applications
While Cinnamon is a clone of GNOME 3, MATE represents a separate development branch of the classic GNOME 2 environment. Both versions include top-notch applications, notably Mozilla Firefox, Mozilla Thunderbird, Banshee, VLC Media Player, LibreOffice, Pidgin, Transmission, GIMP and a package manager Synaptic.
Linux Mint is one of the most popular free operating systems in the world. Many Linux users prefer this distribution over Ubuntu OS due to its support for outdated hardware and weak hardware components.
 Order 343 mail. Order by Russian post. Consequences of failure to appear in court when summoned
 How to put a password on a folder on a Windows computer without and with programs
 Pluton – Free Bootstrap HTML5 One Page Template
 History of ZX Spectrum: Myths and reality New Spectrum
 Voice assistant Siri from Apple Siri functions on iPhone 6s
 How to roll back to a previous version of iOS?
 Unlock iPad in four days