Search for identical files
An excellent free program for finding duplicate files (pictures, photos, music, etc.).
Let's imagine this situation... Six months ago you purchased a brand new terabyte hard drive. And so, when you try to download another movie from torrents, your PC tells you that this is how it is, but there is no more space on your hard drive :). Nightmare!!! Guard!!! How can this be, it was a whole terabyte:(((?!!
And the whole problem may lie in the fact that too many duplicate files or even entire folders have accumulated on the new hard drive.
If you start manually rummaging through your “treasures” downloaded from the Internet, you can spend more than one day finally finding two identical installers of the same program or several copies of the same song!
But you can do much wiser - instruct your PC to carry out “soul-searching” and, based on the results of this process, decide what needs to be thrown away and what to leave.
However, the basic version of Windows does not provide a function for searching for copies of files, so we will have to use third-party software for this matter. One of the best free solutions to this type of problem is the program DupKiller.
It can do almost everything you need for a comfortable and quick search for duplicate files, so it can easily compete with paid applications, for example, Duplicate File Remover:
Comparison of the DupKiller program with its paid analogue Duplicate File Remover
The only major drawback of DupKiller is the lack of support for NTFS Hard Links. That is, the program cannot create links to the selected file for it to work with several separate applications (without harm to the latter) :(.
If you are not going to rummage through folders with setup files of various programs installed on your PC, then DupKiller is just the tool that will allow you to put things in order on your hard drive.
Installing DupKiller
To install the program, we need, as always, to open the downloaded archive and run the installation file. In the first window that appears, we will be asked to select the installation language (we choose, of course, “Russian”), and then it all comes down to simply accepting the license agreements and confirming all offers :). Once the installation is complete, we will see the DupKiller working window:
![]()
DupKiller Interface
The program interface is quite simple and convenient. At the top we see a standard menu bar, which we will hardly use, on the left is a section panel, and on the right is a direct workspace with the necessary buttons and options.
A rather big advantage of DupKiller is the step-by-step automatic switching of tabs on the left panel after you perform one action or another. Thus, something like a step-by-step wizard for working with the program is implemented, which is undoubtedly very convenient for a user who is not familiar with the new interface.
By default, after launching DupKiller, we are taken to the “Disks” tab. Here we can use checkboxes to indicate those sections that should be scanned for duplicates.
For the first time, I advise you to perform a full scan in order to find out the real picture of what is going on on your entire hard drive, so don’t linger on this tab and click the “Scan” button.
After initializing the hard drive scanning process, we are automatically taken to the “Statistics” tab:

Here the entire process of scanning the hard drive is displayed in a visual form. In addition to the log file window in which DupKiller operation statistics are recorded, we can obtain some information from the status line at the very bottom of the program’s working window.
First of all, this is the number of files found. While in the statistics section, we can pause or completely cancel the scanning process, but in the latter case we will have to start a new search from the very beginning.
The scanning will not take too long (it all depends on the size of your hard drive). For example, I had 80 Gigabytes scanned in a little less than three minutes :). At the end of the process of searching for duplicates, we will be immediately redirected to the last section “List”:

Removing duplicates and other unnecessary files
In fact, this is the most important window of the program, so let’s look at it in detail. The first thing I advise you to do is expand DupKiller either to the full screen, or stretch its window horizontally so that it is convenient to see the entire status line at the bottom.
On it we will see the number of duplicate files, their total size, and when selecting duplicates to be ruthlessly destroyed, also the total size that will be freed up after their removal.
The next step is to sort all the duplicates found by the amount of space they occupy on the hard drive. To do this, you just need to left-click on the “Size” inscription (fourth column of the list).
After this, all files will be sorted in ascending order of their “appetites” for hard disk space. That is, the “heaviest” files will be at the end of the table, and the smallest ones will be at the top (you can do the opposite by clicking on “Size” again and waiting for a new list to be compiled).
Now you can start selecting unnecessary files. In the main list they are divided into groups that display duplicates of the same file in different folders (with their indication, of course).
For some types of files (text and graphic, and when the plugin is activated, also audio) DupKiller has a preview function. That is, as soon as you select a specific file, a window immediately pops up in which you can see its contents without opening it.
For small files, using this function seems quite convenient, but large files take quite a long time to open, which greatly slows down both the operation of the program and the system in general.
Therefore, I advise you to deactivate this function by clicking the “Disable Preview” button (you can re-enable it by clicking the “Preview” button on the toolbar above the list of files).
When all the preparations are completed, all we have to do is tick the unnecessary duplicate files and click the “Delete selected files” button on the toolbar. That's it - we got rid of excess ballast on the hard drive and freed up much-needed space for re-cluttering :).
As you can see, everything turned out to be quite simple - you were able to “conquer” an impressive amount of space on your hard drive the first time without any additional installations.
However, DupKiller is by no means devoid of subtle settings, but on the contrary, it is simply replete with them. As you understand them, more and more new functions of the program will open up for you! Let's look at the most important of them.
Additional functions
So, DupKiller allows you to scan not only the entire hard drive at once, but also individual folders:

Files and folders
To configure the directories to be checked for duplicate files, you need to go to the “Files and Folders” tab. There are two sections here.
In the top (“Searched files”) you can specify which types of files need to be compared (all are activated by default). And in the lower one (“Searched folders”), switching to the “Only specified folders” mode, set a list of folders that should be checked for duplicates.
Folders can be added either using the “Add” button or by simply dragging and dropping, which can sometimes be an even more convenient option.
Exceptions
The next tab - “Exceptions” - allows us, on the contrary, to specify those file extensions and folders that should not be included in the scanning process:

Settings
Working with this tab is similar to the previous one, so we will not focus our attention on it, but move on to the next section - “Settings”:
![]()
This is where you can have fun! :) Here we can set the criteria by which files should be compared, the degree of similarity at which the files will be considered the same, the sizes of the processed files, as well as many other parameters.
If these settings are not enough for you, then DupKiller also has “Other settings” :)

If in the previous section there were parameters related directly to the process of scanning files and folders, then these settings relate more to the program interface.
Here you can set the priority of the search process, change some parameters for displaying the list of duplicate files, and also work on saving and restoring settings. Regarding the latter, there is a little secret ;).
DupKiller can be made to work in portable mode (from a flash drive or disk). To do this, you need to activate the “Save settings” item in the “File” menu and save the file with program parameters in the folder where DupKiller is installed (by default C:\Program Files\DupKiller). Now all that remains is to copy the above folder to removable media and you're done ;).
The last group of program settings concerns the “Delete” parameters of files:

Here all the settings are extremely clear, so we do not focus on them, but consider the global Advantages and Disadvantages of DupKiller.
Advantages and disadvantages of DupKiller
- byte-by-byte file comparison;
- file preview function;
- flexible scanning settings;
- auto file selection function;
- ability to use as a portable application.
- There is no way to create hard links to files.
conclusions
As you can see, DupKiller has virtually no disadvantages, so it can be recommended as an ideal free program for war with clones of files on your hard drive! Good luck to you and may the FORCE be with you!!! :)
P.S. Permission is granted to freely copy and quote this article, provided that an open active link to the source is indicated and the authorship of Ruslan Tertyshny is preserved.
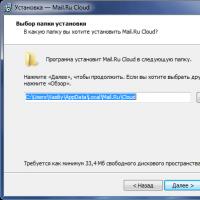 Cloud storage Cloud Mail
 25 online tools to generate easy-to-pronounce and random passwords
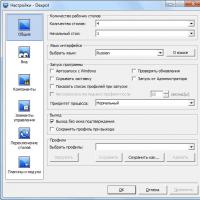 Dexpot - additional virtual desktops
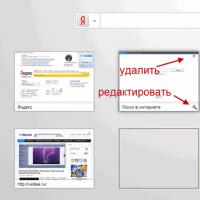 Visual bookmarks Top-Page
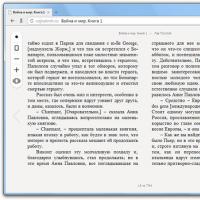 The browser now has notifications from social networks and support for e-books
 Windows 10 Recovery Disk
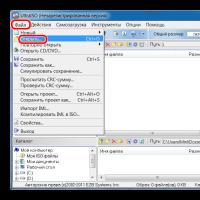 How to create a bootable USB flash drive