Creating recovery discs for Windows 10 7 XP
Unexpected failures occur in any operating system. You can create a Windows 7 recovery disk yourself by writing the necessary files onto a suitable storage medium. For this procedure, the user will need about 10 minutes of time.
Restoring Windows 10 from Control Panel
The latest version of the operating system has many bugs and sometimes after updating it may not start for some users. A solution to this problem has been provided by Microsoft and a Windows 10 recovery disk can be created from the Control Panel.
If the creation of a Windows 10 recovery disk does not take place on your own computer, then you must definitely find out the bitness of the broken and temporarily used Windows, they must be the same.
Instructions on the question: how create a Windows 10 recovery disk:
After the program finishes, the flash drive can be used to restore Windows 10 and install it. Sometimes creating media using this method fails, in these cases you need to create a rescue disk using other methods.
Some users may need to create a Windows 8 recovery disc. This can be done in the same way as described above.
Reinstalling Windows 10 with the official application
The Microsoft website suggests using a separate application to create a bootable USB flash drive.

After these steps, you can use the USB flash drive to install or reset the system.
Windows installation flash drive from system image
To restore Windows 10 from a system image, you must first create this file. This can be done through the built-in application. To open it, go to " Control Panel» → « All Control Panel Elements» → «» → « System image backup».

In the next window you need to select the section “ Creating a system image».

In the window that appears, you need to select the media on which the image will be saved.
It is advisable to create a separate disk partition to store this data, as it will be needed to restore Windows 10 from an image. If you don’t have a flash drive at hand, you can reset the system settings from the created file on your hard drive.
After data archiving is completed, the user will be prompted to create a system recovery disk. Thanks to this, in the event of an unexpected error in the system, you can restore all the data that was on the archived disk.
Installation flash drive for Windows via UltraISO
First, you need to download the ISO file of the desired OS version from the Internet. Also, to create a Windows 7 system recovery disk, just like other versions, the user will need a program or its analogues ( Rufus, Wintobootik etc.) capable of writing system images to a USB drive.

To restore Windows 7 via an ISO image, you need to do exactly the same steps, but at the stage of selecting an image file to burn, you need to use an image of the seven or other versions of the OS. The same method is suitable if you are wondering how to restore Windows XP or another version of this OS.
Creating an installation disk
If for some reason a laptop or PC does not want to accept a bootable USB flash drive, for example, on very old devices or if the USB ports are malfunctioning, then in these cases you can use a DVD-R or DVD-RW disc.
Due to the fact that disk media capacity is limited, you need to find an image up to 4.7 GB (capacity for DVD-R and DVD-RW). Such files contain only the base assembly without additional data and applications. Official images of all Windows OS occupy a volume of 2–3 GB. But amateur versions have a basic set of popular programs and improvements, so they can take several times more.
How to make an installation disk
To do this you will need a floppy drive, DVD and UltraISO. The program can be replaced with another one that can write information to disk.

Now you need to wait for the transfer of information to the optical disk to complete.
Multiboot flash drive
Such a multifunctional device is necessary for computer technicians. It is much more convenient to restore Windows XP, Vista, 7, 8, 10 and other versions from one universal flash drive. This solution is called a multiboot device. To create it you will need a program WinSetupFromUSB. It uses a minimalistic bootloader that allows the boot disk to be used with several system images at once.
Initially, you need to download WinSetupFromUSB and ISO images of the desired systems. After starting the program, a window with settings appears in front of the user.

It needs:
- Select the drive to install on.
- Check the box " Auto format it with FBinst" This allows you to format the media to the desired format before starting installation.
- Select FAT32 format. Please note that this file system does not recognize images larger than 4 GB in size. When installing NTFS, some computers will not be able to see the flash drive and it will not work.
- Select the type of operating system that will be installed.
- In Explorer, assign a system image file.
- Press the button " GO» and confirm the actions in the new warning windows.
After this, the process of installing files on the specified media will begin. Installation details can be viewed by checking the "".
After completing the installation of one system image, you can immediately begin mounting the next OS. Now you can restore Windows XP and other versions of the operating system using a single flash drive or a separate hard drive.
When recording a second OS distribution, you need to uncheck " Auto format it with FBinst" Otherwise, the previously recorded system will be deleted from the drive.

In addition to the installation version of Windows, you can load Linux distributions and many useful programs like Acronis, antivirus and backup bootloaders onto the drive using this method. To do this, you need to first download the necessary ISO files and when installing on the drive in the WinSetupForUSB program, select the “ Linux ISO/ Other Grub4dos compatible ISO»

After installation is complete, immediately check the functionality of the programs on the flash drive by checking the “ Test in QEMU».
For the drive to be recognized by the computer, it must be inserted into a USB 2.0 port connected directly to the motherboard.
When starting in the BIOS, the user will see a minimalistic GRUB4DOS window, in which you need to use the keys to select the OS to be launched or the installed program.

To create a multiboot flash drive, they also use the program MultiBoot. It includes Grub4Dos installer, formatter and WinSetupUSB. The only difference from the previous creation method is a more beautiful graphical menu when starting the media and already built-in programs for recovery, Acronis, etc.

How to run an installation flash drive or disk
After creating a Windows 7 recovery disc on your laptop or PC, you need to run it. To do this, insert the storage medium into the device. After this, turn off your computer.
To restore the system, you must first configure the device's BIOS so that it can start the flash drive or disk. To do this, you need to press a certain key in the first 2 seconds after turning on the computer. It differs for different manufacturers. You can read more about this in the instructions for the device. Approximate use of keys to enter the BIOS on different branded devices:
- Acer, Lenovo, Asus, Sony - F2 or Ctrl + Alt + Esc
- HP - F10
- Samsung - Del
- Dell devices - F1 or Del
To ensure that the BIOS boots on the first try, press the desired key 3-5 times. After this, a blue menu with items in English will appear on the screen. On personal computers, the BIOS may look more attractive.

To boot from the installation disk, you need to go to the " "Boot" and there change the download priority (“ Boot Device Prority"). In the same section you need to find a previously made flash drive or disk with recovery files and move the media to the first boot position using the F5 and F6 keys.

After this you need to find the section “ UEFI Boot Support" or " "Boot Mode" and there set Enabled or UEFI Boot.
After these settings, you need to go to the “ Exit" and select the item " Exit & Save Changes».

The installation version of Windows will begin to load from the disk. Depending on the OS version, the boot menu may differ in appearance.

Using a recovery disk, you can perform not only a complete reinstallation, but also partial repair of damaged files via the command line, or restore damaged download files.

Select the desired recovery method from the program menu and wait until the utility finishes. The main thing is that the device does not turn off during recovery; it is better to connect it to the network. If this is not done, the recovery process may fail and result in a hard drive error. A similar problem will have to be solved by physically repairing the device.
Resetting the system on laptops
To restore the system on laptops, there is a built-in reset of OS settings. To restore Windows 7 without a disk, you need to run a standard recovery tool on your laptop.
To do this, after starting the device, hold the power button or a specific key combination for 5-10 seconds. Next, to restore the system using the built-in program, select the desired item in the menu that appears and wait until the program finishes.
The laptop will restore Windows XP if it was originally installed on it. The same will happen with all other OS versions. If at the time of purchase there was an old version of the operating system, then it will be restored.
There are many different ways to restore a system after a breakdown or infection. The simplest method is to completely reinstall the OS using an installation disk, which is created in 10 minutes and can then be used on any device to repair them.
 Sandboxie download Sandboxie in Russian download sandbox for free
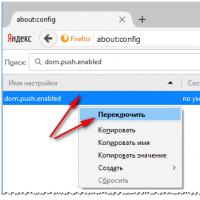 How to disable PUSH notifications (alerts) in browsers: Google Chrome, Firefox, Opera
 25 online tools to generate easy-to-pronounce and random passwords
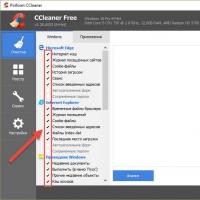 How to use CCleaner
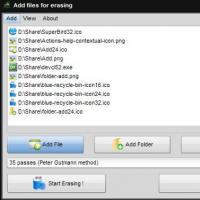 Programs for permanently deleting files
 Windows 10 backup
 How to enable incognito mode in Chrome