Creating a restore point and restoring Windows 7
When working on the Windows operating system, it is very important to create operating system restore points in order to restore the Windows operating system in case of problems. Because sometimes it happens that the Windows operating system starts to produce errors, slow down, and respond poorly to commands.
This may happen after installing some program or driver. If problems begin with the operating system after some actions, you can rollback (restore) the system to its working state.
System Restore helps you avoid having to reinstall the operating system. The Windows operating system automatically creates restore points weekly and when you install new programs or install operating system updates. You can also create a system restore point yourself.
Make sure that you have System Protection enabled on your system drive so that you can use System Restore.
Creating a Windows 7 restore point
A restore point is the state of system files and settings at a specific point in time. You can start the process of creating a restore point in different ways, in this article I describe the easiest way to create a restore point for the Windows 7 operating system.
To create a restore point, you need to go to the Start menu, right-click on Computer, and select Properties from the context menu. In the “System Protection” tab, click on the “Create” button.
In the “System Protection” window that appears, enter a description of the recovery point (you can write whatever you want, in the example I wrote “New recovery point”) and click on the “Create” button.
![]()
In the System Protection window, you will see that a system restore checkpoint is being created.

After the process of creating a system restore point is completed, the message “Restore point created successfully” appears in the “System Protection” window.

Creating a restore point in the Windows XP operating system
To create a restore point for the Windows XP operating system, go to the Start menu => Accessories => System Tools => System Restore => Create a restore point.
In the “Create a recovery point” window, write “Description of the recovery point”, then click on the “Create” button. After this, a new recovery checkpoint is created.
Windows 7 System Restore
Now let's look at the most typical case of restoring an operating system. To restore the system, you will need to follow the same path as described when creating a restore point.
You need to go to the “Start” menu => “Computer” => “Properties” => “System Protection” => “System Restore”. Next, you need to click on the “Restore” button.
Another option to launch System Restore is to go to the “Start” menu => “Control Panel” => “System and Security” => “Restore your computer to a previous state.” In this window, click on the “Start System Restore” button.

In the “Restore system files and settings” window, click on the “Next” button.

In the “Restore your computer to a previous state” window, select a recovery point from those proposed, or select another recovery point by checking the box next to the “Show other recovery points” item.
For information, you can click on the “Search for affected programs” button. The system is scanned for affected programs and drivers.
After scanning, you can view a list of programs in the window that will be affected by a specific system restore point. After that, click on the “Next” button.

In the next “Restore Point Confirmation” window, click on the “Finish” button. After this, the process of restoring the operating system begins and this process can no longer be stopped.

The Windows 7 operating system is completely restored, and at the end of this process the computer restarts.

After the operating system restore process completes, a message indicating that the system restore was successful appears.

The Windows 7 operating system is restored to the point at which you selected the restore point. If there is a problem with the operating system, you should not be afraid to carry out this operation. I have used System Restore many times, and using Operating System Restore has often helped me out.
After problems with the system, you need to start the process of restoring it. Then the Windows 7 operating system is restored, and after that you will no longer need to reinstall the Windows operating system.
If problems with the operating system continue, then try performing this operation with a different recovery point.
In more complex cases, for example, if you cannot boot your computer, the operating system can be restored from an operating system image using a Windows installation disk, or using a bootable USB flash drive, which can be created using special software programs, which you can read about at on my website in the “Programs” section.
To ensure that the failure of the operating system or hard drive does not create problems for you, you will need to start archiving the operating system and your data using built-in tools, or use appropriate programs for backup.
In this case, you can always restore the operating system and your data from a backup copy.
Restoring the Windows XP operating system
To restore the system in the Windows XP operating system, you will need to go to the “Start” menu => “Accessories” => “System Tools” => “System Restore”. In the “System Restore” window (here, by default, the “Restore the computer to an earlier state” option is activated), click on the “Next” button.
In the “Select a recovery point” window, select a system restore point from those suggested by the operating system. First, select a day, and then a specific restore point, then click on the “Next” button.
In the “Confirm recovery point selection” window, click on the “Next” button. After this, the process of restoring the Windows XP operating system begins.
Conclusion
If necessary, the system can be rolled back to a working state using a Windows 7 restore point.
Creating a Windows 7 restore point (video)
Restoring Windows 7 (video)
 Cloud storage Cloud Mail
 25 online tools to generate easy-to-pronounce and random passwords
 Dexpot - additional virtual desktops
 Visual bookmarks Top-Page
 The browser now has notifications from social networks and support for e-books
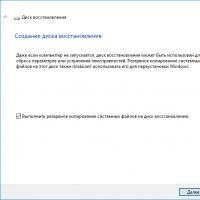 Windows 10 Recovery Disk
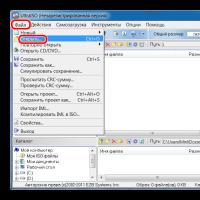 How to create a bootable USB flash drive