Remote d. "Remote computer". Remote access to a computer via the Internet
Free programs for remote computer control
- Server administration,
- Network technologies ,
- System administration
Remote computer control programs allow you to remotely control another computer via the Internet or local network. This is convenient when you need to help a not very experienced user, for example, a relative or friend who is poorly versed with a computer, do something on it without leaving your cozy chair and without wasting your nerves and time on telephone conversations. Such programs are also convenient to use for remote work, for example, from home to connect to the office and vice versa - to access your home PC, for system administration of an entire fleet of computers and servers.
Let's carry out comparative analysis remote control programs, we will highlight their advantages and disadvantages.
TeamViewer
One of the most popular programs for remote access, it can be quickly downloaded and installed or launched immediately, without installation, even the least experienced person can handle it advanced user. When launched, the program displays a window with an ID and password to access this computer, and TeamViewer allows you to connect to another computer by specifying its ID and password.Advantages:
The program has several main modes of operation: remote control, file transfer, chat, demonstration of your desktop. The program allows you to set up 24/7 access to your computer, which will be convenient for system administration. The speed of operation is quite decent, there are versions for all mobile platforms, for various operating systems, which is very pleasing. A simple and completely understandable interface plus a number of additional utilities to expand the functionality of the program, will be useful for remote support services.
Flaws:
Although the program is free, it is only for non-commercial use, and when working with it for more than 5 minutes, a number of difficulties arise, for example, TV may block the session remote connection, recognizing it as commercial use. For 24/7 remote access or administration of multiple computers, computer network, you will have to pay for additional program modules. The cost of the program is high.
Result:
This program is ideal for a one-time remote connection or for using it for short periods of time. Convenient to use from mobile platforms, but not to administer a large number of computers. You will have to pay extra for additional modules.
LiteManager
A simple, but quite powerful program in terms of capabilities, consists of two parts, the first is Server, which needs to be installed or launched on a remote computer, and Viewer, which allows you to control another computer. To operate, the program requires a little more skills and experience from the manager, although working with the server is even simpler than in TeamViewer, the server can be installed once and no further actions are required from the user, the ID will always be constant, you can even set it yourself manually, which very convenient for memorization. The LiteManager Free version is free for personal and commercial use.
Advantages:
In addition to the main remote access modes: remote control, file transfer, chat, task manager, registry editor, the program also has unique functions, for example: inventory, screen recording, remote installation. The program is free for use on up to 30 computers, it can be used for round-the-clock access without any additional modules. There are no restrictions on operating time. It is possible to configure your own server ID for configuration corporate service support. The program does not have any restrictions on operating time or blocking.
Flaws:
There is not enough client for mobile platforms or other systems, there is a limit to 30 computers per demon paid version, for administration more you need to purchase a license. Some specific operating modes are only available in the Pro version.
Result:
The Litemanager program is suitable for providing remote support, for administering several dozen computers absolutely free, for setting up your own remote support service. The cost of the program is the lowest in its segment and the license is not limited in time.
Ammy admin
The program is basically similar to TeamViewer, but a simpler option. There are only basic operating modes - viewing and control, file transfer, chat. The program can run without installation and is free for non-commercial use.
Advantages:
A simple and lightweight program, you can work both on the Internet and on a local network, has minimal settings and does not require any special skills. Compared to TeamViewer, the licensing policy is more lenient.
Flaws:
Minimum functions for remote management, it will be difficult to administer a large fleet of computers, with long-term use, more than 15 hours per month, the work session may be limited or blocked, paid for commercial use,
Result:
This program is more suitable for a one-time connection to a computer and not very complex manipulations, for example, to assist an inexperienced user in setting up a computer.
RAdmin
One of the first remote control programs and well-known in its circle, I could not help but mention it, more intended for system administration, the main emphasis is on security. The program consists of two: server and client components. Requires installation, it will not be easy for an inexperienced user to figure it out, the program is designed mainly to work using an IP address, which is not entirely convenient for providing technical support. Internet support. The program is paid, but has a free trial period.
Advantages:
The program has high operating speed, especially in a good network, thanks to the video driver for capturing the desktop, increased reliability and security. Intel AMT technology is built-in, which allows you to connect to the BIOS of a remote computer and configure it. Only the basic operating modes are implemented: remote control, file transfer, chat, etc.
Flaws:
There is almost no way to work without an IP address, i.e. connect by ID. There is no client for mobile systems. No free version, only test period 30 days. To work with the program, you need the skills of an experienced user. When connecting the video driver may disable graphical shell Aero, sometimes the screen flashes.
Result:
The program is more suitable for system administrators for administering computers and servers on a local network. To work over the Internet, you may have to set up a VPN tunnel.
How to control another computer via a local network? IN Lately This issue is increasingly affecting not only ordinary users personal computers, but also local network administrators. I'll start by considering a program that not only controls a computer, but can also control several machines simultaneously.
Radmin – please love and favor!
Radmin: what is this program and how to use it?
This program is very famous on the Internet. It is advisable to download it from the official website. The program consists of two subprograms, these are “Radmin Viewer” and “Radmin Server”. The first subroutine is installed on the computer from which control will be carried out, and the second, accordingly, on the remaining computers. Let's start by setting up "Radmin Viewer".
How to configure Radmin Viewer?
After you install the program on your computer and run it, the main settings window will open in front of you.
Don’t forget to install “Radmin Server” on the rest of your computers, since without this subroutine the work will be impossible.
So, click on the “Connection” tab and go to the “Connect to” tab, a window will open in which you will need to specify the IP of the remote computer and click the “Ok” button.

The next window will ask you for a username and password, which you will need to set in the “Radmin Server” setting.

After entering the data, a connection will occur and you will be able to control another computer over the local network.
How to find out the IP address of another computer and configure access to the “Radmin Server”?
Now it's time to set up the second subroutine. After installing Radmin Server on the computer that you wanted to manage over the local network, you will see an icon of two computers in the lower right corner, and when you hover over it you will see the IP of your computer.

Right-click on this icon and go to the “Radmin Server” settings tab.


Now you need to select the “Radmin” tab and click on the “Access Rights” button again.

In the next window, click the “Add” button and enter any username and password.

Check the box " Full access" and click the "Ok" button. Now you have configured access rights in the program and can manage this computer via a local network.
Since our site is designed for average users, some disagreements arose within the non-Oshibka.Ru team regarding the usefulness of this article. Typically, such material is intended for more experienced users who at least have a good knowledge of the Windows OS.
On the other hand, where should a novice user go who has only a vague idea of what RDP, TCP, UDP are? But you really want to know? Again, is this necessary for the average user? Maybe one simple program is enough for him?
A difficult situation.
Explain in one article what remote access to a computer via the Internet is, but in such a way as not to frighten off the visitor.
We decided to experiment. Talk about difficult things as clearly as possible. We will take your comments into account.
What is this article about?
This article will tell you about two types of remote connection, briefly tell you what it is ID. Will tell you about the programs Remote access And Remote Desktop. We will also try to configure your computer in order to access it remotely without using third-party programs. Complex terms in the article are highlighted in brown and provided with explanations in the form of tooltips.
Remote access concept
Remote access to a computer via the Internet is called operating system tools, or third party program, allowing you to get visual or file access to a computer located at a remote distance, but still connected to the Internet.
How is the required computer identified on the Internet?
Conventionally, all remote access programs can be divided into two groups according to the type of connection:
- Using ID
- Using IP addresses And domain names
Remote access programs using ID
Of great interest are programs that use ID(unique identificator). Receipt method ID something like this: when a remote access program is launched on the computer to which you plan to connect, it sends a request to its server through which the connection will occur.
Having received this data, the server generates for the computer unique identification number — ID. This number is assigned to the computer. In the screenshot below it is highlighted in red.
Knowing this identification number and password, you can connect to a computer from anywhere in the world with this ID.
It remains unchanged until the hardware is replaced or the OS is reinstalled.
So using such programs is very convenient. When you change Internet provider, city, and even country, your computer ID Will not change.
Lack of programs using ID one - they are paid or shareware. Condition - you must not use the program for commercial purposes.
Example of programs using ID— TeamViewer, Ammy Admin. But the list is not limited to these two. They are simply the most popular and always heard by users.
We will not spend a lot of time on these programs, since their interface is simple and allows you to learn the program in 5-10 minutes. We may look at each of them in the future.
You won't have any problems with these programs. Use it for your health without overusing it. If TeamViewer will connect to a large number ID- then sooner or later, the communication session will be limited to five minutes.
Remote access programs using an IP address or domain name
With this category everything is a little more complicated. They need a static IP address or domain name. Connection via IP address, this is a classic connection type. It does not allow as much flexibility in the location of the computer and is most often used in "office space".
In order to use it, you need to do the following.
Connecting a fixed IP address or domain.
You need to connect with your provider additional service — Fixed IP address . This service is provided by many providers, including mobile ones. This service will assign your home network external IP address format 123.123.123.123
It is this address that will allow you to find your computer from outside.
An alternative to a fixed IP address can be the service DynDNS. When registering, you will be given a custom domain, for example:
neoshibka.dyn.com
Next, you simply install a program on your computer that, when turned on, will track your current IP address and send it to the server DynDNS, which in turn will match your current dynamic ip address , with address yourlogin.dyn.com
Thus, no matter where you are, no matter what provider you use, no matter how often your IP address—the address of your computer—changes, yourlogin.dyn.com
We won’t undertake to say, but getting a fixed IP address from a provider is somewhat easier and cheaper than using DynDNS. For example, at the time of writing this article, the cost of a dedicated IP address was only 20 rubles. / month
Advertising
Opening a port to a target - a remote computer.
Even now, knowing our IP address or assigned to us DynDNS domain, we can hardly connect to the computer - the firewall will not let us through. Most likely the port 3389 used by the program Remote Desktop which we will tame in this article will be closed. For everything to work as it should, we will have to open it and redirect it to the right computer online.
Difficult? Not at all. Let's try to figure it out in practice.
Remote access to a computer via the Internet using Remote Desktop
So, first what we did was get a fixed ip address from our ISP. Let's remember, write it down, draw it.
Second. Let's find out intranet IP address our computer. To do this, we will follow the following path: Network and Sharing Center => Local Area Connection => Details  As you can see in the screenshot, the address of our computer within the network 192.168.1.102
Third the point will be opening the port 3389 to the above address. To do this, let's go into the router. In our case it is ADSL modem TP-LINK. We will show everything using his example. There’s nothing you can do about it, but you can’t do without instructions if you don’t know how to configure the modem yourself.
In our case we enter through Google Chrome by the address 192.168.1.1 and under the combination admin/admin. We get to the information page.
Let's go to Advanced Setup => NAT => Virtual Servers and press the button

Here you can choose ready-made services or create your own.
We will create our own and call it Udalenka, but the name can be absolutely anything. We register the local address of the computer, the one we spied earlier. In the table we enter the port everywhere 3389 and select the protocol TCP/UDP. We do all this based on a standard Windows application. Remote Desktop. For other programs, the ports may be different. A good list of applications and the ports they use is provided. (What we are learning may even be useful for games).
If, for example, you want to use Remote Desktop, and advanced RAdmin, then you will have to register a different port for it: 4899 .
Press the button

Item fourth, we will run on the computer we are going to control - Terminal Server Service. It’s worth clarifying something here.
Using the method described below is not recommended from the point of view of licensing purity if you do this in the organization where you work. Not sure about Windows 10, but in Windows XP - 7, the license was not violated if only one user connected to the computer.
We do all this for the purpose of familiarization and in order to learn the principles of remote access to a computer via the Internet.
So, to run it on your computer Terminal Server Service. In Windows XP this was done simply - Go to Administration — Services and applications — Services found it and simply turned it on. This allowed one user to connect to the computer. In this case, the user who was sitting locally was disconnected.
In Windows 10 we need to do things a little differently. We need a special patch. You can download it from here. This patch will allow you to run on the system Windows 10 terminal service.
Lately, search engines Google systems and Yandex began to be considered this file as a viral threat. In fact, the file lay on the site for two years, and not a single scanner ever considered it to be malware. However, the file is now stored outside of notOshibka.Ru - you download it at your own peril and risk.
Let's unpack the downloaded file to any location. For example on Desktop. Run as Administrator file install.bat

A black window will indicate a successful result. command line with this content:

Fifth In this paragraph, we will set a password for our user, and also add him to the group.
For this purpose on the icon Computer and right-click to select Control.

In the window that opens, on the left side, we need to expand the list Local users and groups, select sub-item Users.
In the list of users, you need to find yourself and right-click.

Enter your password twice, press

Now we need to add our user to the group Remote Desktop Users.
To do this:
Right click on the user − Properties.
In the window that opens, go to the tab Group Membership and press the button <Добавить…>

Next, do everything in the same order as in the screenshot: 
As a result of the work done - Remote Desktop Users should appear in the general list of groups to which the user belongs.

We would like to draw your attention to the following. The above describes how to assign a password to your user. But it’s better to create a new one and add it to the groups. Otherwise, you may end up losing some data. For example, we logged out wherever possible. I had to enter all the passwords again.
Let's check if we were able to gain remote access to the computer via the Internet using Remote Desktop.
We go to another computer, go to START menu => All programs => Accessories and run the program "Remote Desktop Connection".
Enter the IP address previously assigned to us by the provider into the window that appears, click the button <Подключить> .

If we did everything we did earlier correctly, then we will be asked almost immediately Name And Password user on Remote machine. Enter them and don't forget to check the box to remember your credentials.

And the last “security touch” will be checking the Remote Machine certificate. Here, too, you need to agree with everything. And also check the box.

That's all. If everything works as it should, you can go through the settings Remote programs Desktop. Here you can turn on/off the sound, change the picture quality, connect local resources to the remote machine.
Hello to all readers of my blog. Marat Nauruzbaev is with you. In the last article I told. Today I will tell you how you can organize remote access to your computer via the Internet.
It's no secret that sometimes there is a need to remotely connect to your home or work computer to download any files or to remotely control your desktop.
For these purposes they are used special programs for remote access to a computer. Moreover, this can be done from anywhere in the world, from almost any computer or even from your smartphone. For remote access, you will not need a static IP; the connection will be made through a generated ID.
I will talk about the three most popular remote access programs, how to install, configure and use these programs. So, let's go...
TeamViewer program
I have been familiar with this program for a long time, and it helped me remotely administrate computers while in an office in another city.
The program has a simple interface, but at the same time it has a lot of additional functions, such as creating interactive conferences, chat, launching in a browser, multi-platform. Program TeamViewer Free for non-commercial use only.
Installing and configuring TeamViewer
To install TeamViewer go to the section " DownloadTeamViewer full version» click « Download» (all pictures are clickable)

After downloading the program distribution, launch it by double-clicking on it

Set these settings and click “ Accept – next»

In the next window, I usually uncheck all the checkboxes and click “ Ready»

TeamViewer will be installed

After installation, you will need to configure TeamViewer, click " Continue»

Set the computer name and password to access this computer. Click " Continue»

In the next window, you can create a TeamViewer account or refuse to do so. Click " Continue»

In the final window, the ID of this computer will be generated. You can save it for future access to this computer from another computer or smartphone. Click " Complete»

This is what the main TeamViewer window looks like. In the left half of the window ( 1 ) shows your ID and password for accessing this computer. In the right half ( 2 ) you can enter the ID of the partner whose computer you can manage

Now, the question arises, how can you control another computer?
To do this, you need to install on the computer that you want to manage, full version TeamViewer, as I described above, or you can install the so-called TeamViewer client (TeamViewer QuickSupport).
TeamViewer QuickSupport
TeamViewer QuickSupport does not require installation or administrator rights. Created for quick access to the computer on which it is running. Not intended to control other computers.
Download for free TeamViewer QuickSupport can be found in the section " Download" official website of the program, select your operating system (Windows, Mac, Linux, Mobile) and next to " TeamViewer QuickSupport» click « Download»

After downloading TeamViewer QuickSupport, let's launch it

In the window that appears, your ID and password will be generated to access this computer.

Now enter this data in the main window TeamViewer to connect to the desktop of the computer you want to control

Enter the password

We see the desktop of the remote computer on the screen. Now you can work on it as if you were at this computer

UsageTeamViewer
Now I will show you some program options that you can use when accessing your desktop remotely.
« Menu» — « Communication»

- Switching sides with a partner – switching modes. Now your partner will be able to control your computer
- Start an Internet call – voice communication with your partner
- Chat – the ability to chat with a partner
- Video – video communication with your partner
« Menu» – « Files and additional features»

- Take screenshot – screenshot of a remote session
- Start session recording – video recording of a remote session
- Open File Transfer – for two-way file transfer between partners
To transfer files, this convenient file manager opens

ProgramLitemManager
Program for remote access to a computer Litemanager allows you to manage up to 30 computers for free (for individuals and legal entities).
Possibilities Litemanager similar TeamViewer, except that the free version of Litemanager does not have the ability to use audio video chat. Also, the paid version of Litemanager has an interesting feature “ Record server desktop according to schedule" I didn’t notice such a function in TeamViewer...
Installation and configuration LitemManager —Server
For installation Litemanager go to , to the section “ Download"and vice versa LiteManager Pro/Free click " Download»

The program distribution package is downloaded in an archive. Double-click on the program archive

The archive opens in the archiver program installed by default.
Program Litemanager consists of 2 parts: the server part (Server) and the viewer (Viewer).
LitemanagerServer is installed on the computer you want to access.
LitemanagerViewer is installed on the computer from which you want to control another computer.
I hope I explained it clearly... :)
You can, in principle, install both parts and from your computer you can control and be controlled. How... clever... 🙂 .
Well, here it is to install LitemanagerServer, run it to install

To scroll through the pictures, click " Back" or " Forward»
At some point the program will ask you to enter a password to access this computer, click “ Change/install»

We come up with and enter a password, click “ OK»

At the end of the installation, leave the checkbox to start the Litemanager server and click “ Finish»

A connection by ID window will appear where your ID will be generated, or you can enter your ID and click “ Connect»

If the connection is successful, the message “ Connected" Press the button " Options» to change connection options by ID

I set these options, I changed the general NoIP server to “ 1_New_noip" You set it at your own discretion, i.e. choose through which server your ID is connected stably

After applying the settings, click " Close»

To view and change other settings, right-click on the Litemanager icon in the system tray and select “ SettingsLM servers...»

A small window will appear that says “ Server settings", by clicking on which an additional menu appears with a choice of LM server settings that you can customize “for yourself”. Let me just say that the menu item “ Connection byID"We have already set it up for you above...

InstallationLiteManager— View

Installing LiteManager - View is similar to installing LiteManager - Server, there is nothing complicated here
After installation is complete, select the license type, “ LiteManagerPro" or " Free" I chose " Free" Click " OK»

UsageLitemManager
The main program window will appear, in the main part of which all created connections will be displayed, and on the right side you can select the connection mode (control, viewing, files, demonstration, etc.)

To create a connection to another computer on which you have installed LiteManager-Server, go to the menu “ Compound» — « Add…»

In the " Compound"Come up with a name for the connection. Enter the ID and password of the managed computer

In the " Network and operating hours» select « Eco mode”, if you and (or) your partner have low Internet speed. Click " OK»

An icon for the created connection will appear in the main program window. Depending on which mode is selected in the right half of the window, double-clicking on the connection will start a communication session with the remote computer

We start a remote control session with another computer and see its desktop. Now we can control it on our computer.
I will list the names of the icons that are located at the top of the remote desktop window...
- Settings
- Other modes
- Selecting a Remote Monitor
- Selecting a remote user session
- Mouse and Keyboard Control
- Lock input and screen
- Send Alt-Ctrl-Del
- Retrieve remote clipboard
- Set remote clipboard
- Screenshot
- Avi recording
- Pin
- Hide toolbar
- Active connections
- Close
When choosing " Other modes» a menu appears where you can use additional program options

For example, open file manager(File Transfer) to share files between computers

ProgramAmmyy Admin
Of the three remote computer control programs described in this article, Ammyy admin is the simplest and does not require installation on a computer.
Download the program in the section " Download» official website. Click on the file name ( AMMYY Admin (exe) ) for download.
Note: At the time of writing, the programAmmyy admin could only be downloaded in browsers Internet Explorer And Opera.

Run the downloaded file AA_vx.exe

Ammyy admin launches immediately without installation.
The main window can be roughly divided into two halves. In the left half of the window ( Client) your ID and IP are displayed. In the right half ( Operator) you can enter the client ID/IP and click the “ Connect» to access the remote computer.
Accordingly, in order for the connection to occur, the program must also be running on the remote computer Ammyy admin

I hasten to note that this program does not require a password to connect. When connecting to a remote computer, a window will appear in which you will need to select connection options and click the “ Allow» to agree to operate the computer. You can also check the box “ Remember my answer for this operator"so that in the future the operator with this ID will connect without the client’s consent

After connecting, a window with the desktop of the remote computer will appear on your screen, on which you can work as if you were behind it

In addition to connecting to a remote desktop, it is also possible to launch a voice chat or file manager by selecting the appropriate menu items in the operator window

You can also take advantage of additional features during a remote desktop session

- Connection settings
- Encoding settings
- File manager
- Voice chat
- Desktop
- Full screen mode
- Winkey
- Refresh screen
- Reconnect
- Actions for the remote computer
For example, open File manager…

also in Ammyy Admin there is an interesting option to launch the application as Windows services. This may be needed when access to a remote computer is needed without constantly running Ammyy Admin.
To install the Ammyy Admin service on a remote computer, in the main Ammyy Admin window go to the menu “ Ammyy» – « Service» — « Install»

The Ammyy Admin service will be installed and launched the next time you reboot. Click " OK»

The Ammyy Admin service can be started manually without waiting for the computer to restart. To do this, go to the menu “ Ammyy» — « Service» — « Launch»

A message will appear that the AA service is running, click “ OK»

In the future, to disable this service, go to Windows services, find the service AmmyyAdmin and uncheck the box next to it. Click " OK»

Or in the main Ammyy Admin window go to the menu “ Ammyy» — « Service» — « Delete»

Conclusion
In this article, we looked at the main three programs for accessing a remote computer, figured out how to install, configure and use these programs.
All programs deserve attention and have the right to life and further development. Each of them is good in its own way and has its own differences, although all of these programs perform the main role of connecting a remote desktop well.
I will still outline the main points when working with these programs:
TeamViewer works great and is functional, but still its cost is high for commercial use;
LiteManager more complex in settings, on my computer it had a low connection speed, especially with low Internet speeds, but it is free when connecting up to 30 computers and the ability to remotely control the computer without the user noticing;
AmmyyAdmin a simple program with the most necessary functionality, runs without installation, but is free only up to 15 hours per month.
By the way! If you want me to provide you computer help using these programs, go to my section.
That's all for me, please write in the comments which remote access program you used and which one you liked the most.
Hello to all site readers! Please advise program for remote computer control. I want to control a computer at work from home or control a home computer from work. Sometimes there is also a desire to help friends solve computer problems remotely, for example, without leaving home, install it for a friend (living on the other side of town) antivirus program, set up Skype, remove the virus, and so on. It is desirable that the program be free, and you do not need to register anywhere, that is, download it, launch it and work. Sergey.
Program for remote computer control
Hello, friends! Without a doubt, such programs are free, and TeamViewer, today’s article is about the latter, it is free for personal use, works without installation, can be carried on a flash drive, and you can register if you wish, now see for yourself.I'll give you two instructions.
1) How to use TeamViewer quickly and without registration.
2) In the second part of the article, we will look at what registration in the TeamViewer program will give us. Registration in the program will help us connect to a remote computer from anywhere and we won’t even need a partner.
The TeamViewer program is so easy to use that all my friends, even those who are very far from computer matters, also got used to using it. When, for example, something doesn’t work correctly for them operating system, they immediately launch the “little blue program with arrows” and call me. They say, come on, help, your program has already been launched, ID is such and such, password is such and such.
There was such an interesting incident in my life. One of my friends asked me to install several free programs, he himself was in another country at that time, with the help programs for remote computer control TeamViewer's plan has come true. Any experienced user can give you hundreds of similar cases when, using TeamViewer, he helped his friends fix some problem in the operating system. Now it’s your turn to get acquainted with this program, if you are not already familiar.
Go to the program website http://www.teamviewer.com/ru and click “Free full version”
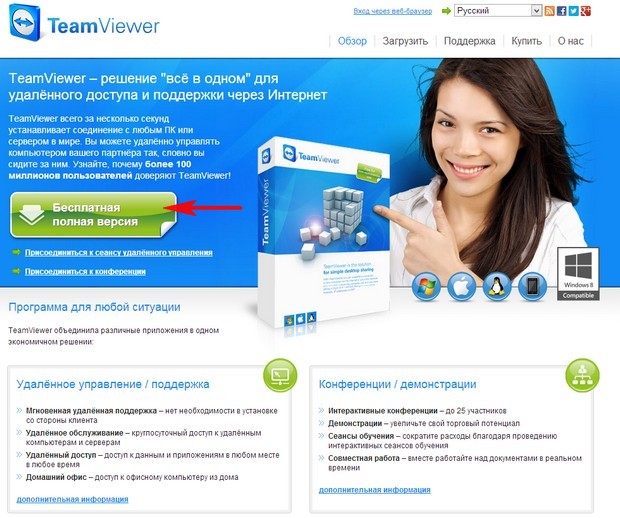
The program installer is downloaded to our computer,
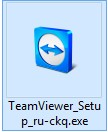
Let's launch it. Check the box “Run only” and “Personal/non-commercial use”. Accept - run.

Pay attention to the main program window. TeamViewer has assigned an ID and password to our computer. If you tell them to your partner, he can easily connect to your computer.

How will he do this? Yes, very simple! On the remote computer you need to do the same thing, namely, launch the TeamViewer program and check the “Launch only” and Personal/non-commercial use checkboxes. Accept - run.

On the remote computer, the TeamViewer program will launch in exactly the same way with its own ID number and password.
Then your partner will enter your identification number ID - 394032155 and click on the Connect to partner button,

The Password field will immediately appear. Your partner enters the password 2917 and clicks Login.

That's all, your partner has connected to your computer and sees your desktop, he can work in the same way as at his desktop. In exactly the same way, you can get onto your partner’s computer. Enter his ID and password in the program and help your friend remotely.

What does registration in the TeamViewer program give and how to set up uncontrolled access
If you register for the TeamViewer program, you will have a much better experience using the program. You will have your own account (permanent ID and password) and with it you can very easily set up permanent access to the computers you need. For example, from your home you can log into your work computer, and from your work computer to your home computer; for this you just need the computer to be turned on. There is no need to specifically launch TeamViewer on a remote computer; after installing the program, the TeamViewer service will constantly run in the operating system.
Install the TeamViewer program, for example on your home computer desktop computer. Let's launch the installer. During installation, select "Install so you can manage this computer remotely" and "personal/non-commercial use." Check "Show Additional settings". Accept - next.

Ready.

The one I installed (a great program, I recommend it) signaled that the TeamViewer service had entered autoload.

Set up uncontrolled access.

Enter the invented Computer Name (account) and password. Further.

Create account TeamViewer is free. Enter your name, email and password. Further.

Ready.

Let's go to our Mailbox, find the letter from TeamViewer and confirm our account, click on the link.

Now, when you start the TeamViewer program, this computer will have a permanent ID and password for the account.

Let's say it's ours home computer. You can connect to it like this. On any other computer (for example, we have a laptop and it’s at work), launch TeamViewer, and simply check the “Launch only” and Personal/non-commercial use checkboxes. Accept - complete. Enter the ID code. As we can see, the program keeps a log, so we simply select our account and click “Connect to a partner”,

Enter the account password

And we can control our home computer.
In the same way, you can control your work computer from home.
 Order 343 mail. Order by Russian post. Consequences of failure to appear in court when summoned
 How to put a password on a folder on a Windows computer without and with programs
 Pluton – Free Bootstrap HTML5 One Page Template
 History of ZX Spectrum: Myths and reality New Spectrum
 Voice assistant Siri from Apple Siri functions on iPhone 6s
 How to roll back to a previous version of iOS?
 Unlock iPad in four days