Installing ClockWorkMod and root rights. Installing CWM Recovery on Android: methods for every taste Obtaining root rights via cwm
An application for managing root rights on Android has become so widespread that it has become almost identical to the concept of directly obtaining Superuser rights on Android devices. Why you shouldn’t combine these concepts, how to get root rights on a device and simultaneously install SuperSU in several ways, we’ll figure it out in the article.
So, SuperSU is a program for managing Superuser rights in Android devices, but not a way to obtain them.
Thus, to use SuperSu, root rights must already be obtained on the device using special means. At the same time, users identify the concepts of managing root rights and the process of obtaining them, firstly, because interaction with the privileges in question is carried out precisely through the program, and secondly, because many methods of obtaining root rights imply, after their execution, automatic installation SuperSU. Below are three ways to get a working SuperSu on your Android device.
Method 1: Official
The most in a simple way to get SuperSU on your device is to download and install the application from Google Play.

Installing SuperSU from the Play Market is a completely standard procedure, implying the same steps as any other Android application when downloading and installing.

Let us remind you that this method installation will make practical sense only if Superuser rights have already been obtained on the device!
Method 2: Modified recovery
This method may imply not only the installation of SuperSU, but also prior to installing the manager, obtaining root rights in the device. The most important thing for the successful implementation of the method is to find a file suitable for a specific device *.zip, flashed through recovery, ideally containing a script that allows you to obtain root rights. In addition, to use the method you will need a modified recovery installed. The most commonly used are or.


Method 3: Programs for getting root
As was said at the beginning, many methods for obtaining Superuser rights, presented in the form of applications for Windows and Android, require the installation of SuperSU automatically after execution. For example, such an application is .

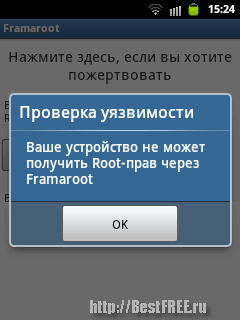
A description of the process of obtaining root rights with the installation of SuperSU via Framarut can be found in the article at the link below.
Root access is the ability of the user of a device running under managed by Google Android, receive full access to its system files. This approach may be necessary for some applications with advanced functionality, such as proxy servers, sniffers, or screen recording utilities.
On the other hand, getting Ruth is a very dangerous step. By doing this, you literally put the device itself and your personal data at risk, since any software, including a virus, can gain access to system files. In order to minimize this possibility, a special program is installed on the phone along with Root, which distributes powers and protects access with a password.

Advantages of Root:
- You can remove applications that are installed as system apps by default and cannot be removed without Root. It’s also easy to clean up built-in services and other system junk that manufacturers love to stuff into their devices;
- editing any system software, including the firmware itself;
- additional functionality. For example, the Xposed framework adds many new features to any smartphone;
- modification of the Android operating system;
- higher phone performance due to software and firmware optimization. Also, the speed of operation is affected by cleaning the RAM by unloading excess from it.
In addition to the advantages, rooted phones also have a number of disadvantages. Moreover, the negative aspects, in our opinion, are much more significant.
Flaws:
- the phone can no longer receive the latest versions software from manufacturers via radio channel. Your firmware becomes outdated and becomes more susceptible to viruses;
- you simply lose the warranty on your phone as soon as you root it;
- the user, through his own negligence, can delete or modify a file, which will lead to the crash of the entire OS;
- during recovery firmware or files modifying boot sector operating system, you can damage the phone so that it can no longer be restored even in a service center.

Examination
Before we get down to business, let's check: your Android may already have Root rights. Moreover, it is very simple to do this:
- So, first, let's go to the store. Google applications Play Store. You can find its icon either on the OS home screen or in the application menu.

- We register in search bar the name of the program we need - you can see it in the screenshot below - and click on the element indicated in the output.

- Next, click the button labeled “Install”.

- We are waiting for the file with all the necessary data to be downloaded and installed on your gadget. Both actions take place in automatic mode and depend only on the speed of your network connection.

- The application can now be launched. This can be done either directly from the Google Play store, or directly from the Android desktop.


- When you first launch, we will be required to provide your consent to a disclaimer. We are informed that Root Checker is not created in order to obtain Root rights, but is only needed to check their presence. Finally, click “ACCEPT”.

- In the next step, we will be told about the various benefits of the program. Let's not waste time, but simply press the button marked in the picture.

- Here we tap on “CHECK ROOT”.

And here is the result. As you can see, we do not have any root rights. This means you can proceed directly to receiving them.

If, after checking, you see an affirmative entry that Root is present, then simply install the application to redistribute them. This is done like this:
- We visit the Play Market again, finding its shortcut on your Android.

- We enter “super” in the search bar and select the desired program in the results that appear.

- Then, of course, click “INSTALL”.

- We accept the required permissions.

- We are waiting for the installation of SuperSU to complete.

- Open the program directly from the store or by tapping on its shortcut on the Android desktop.

- When our application is launched, click the marked button and start working with it.

Now, whenever any application requests Root access, you can deny it or, conversely, answer in the affirmative.
Getting Root
Attention! Before you get down to business, charge your phone battery. If the firmware process is interrupted halfway, it may not be possible to restore it!
Since there are a lot of phones running the Android operating system, rooting each of them can be significantly different. For example, on Samsung you can use special program installed on your computer, and unlock Xiaomi bootloader It will only work with the permission of the creators. So we will not describe in detail the instructions for all phones, but will only touch upon general principles getting Root and show you a concrete example.
Using programs
The easiest and most universal way to get Root on Android is to try one of the programs created for this. The principle of working with such software is simple - you install the utility on your phone or Windows PC, launch it and follow the prompts on the screen. If your model is supported, the rooting process will begin, which should lead to a positive result.
Let's look at a few of the most popular applications to get Ruth.
This software is very easy to use and is installed on your Android as an APK file. Before proceeding with the installation, you must allow the APK to run from unknown sources. This can be done in the security settings. By default, Framaroot is not on Google Play, so you need to install the software as an APK.

The following program has a rather “crooked” translation (hieroglyphs are visible here and there), but it copes well with its main function. Naturally, only on supported models. The speed of the utility is also pleasing. Brute force is not used here. But there are also negative aspects. There have been cases of phones being “bricked” after the intervention of Baidu Root.

Unlike previous applications, this program looks several orders of magnitude more interesting. It offers easy navigation and reliable operation. But it already works from a computer. Before you start rooting, you will need to go to your smartphone's settings and enable USB debugging there.

As soon as a smartphone, for example, Lenovo, Huawei, ZTE, Fly, HTC, Asus Zenfone, Meizu or LG, is connected to the PC, the application will scan it and automatically determine whether it can be Rooted. All you have to do is press the confirm button. Please note that during the firmware process the device may randomly reboot. Do not unplug the cord at this moment.
The following application also works in tandem with a computer and has a fairly extensive base of supported devices. But again, there are hieroglyphs everywhere and it’s not so easy to understand what to press at a certain point in time. But if you treat the process more or less carefully, it will be difficult to make a mistake.

There was already a program with a similar name on our list, but this software is not a copy of it. The advantages of Kingo Root include the most extensive list of supported smartphones. The work process itself is also very simple. You will have to connect the device to the PC via a cable and, if it is supported, click the button once.

The list of programs for obtaining Root on Android can be continued for a very long time, but our goal is only a general immersion in the problem. Use a search engine and see which utility is suitable for your model.
Via Recovery
Recovery is a PreOS mode that is capable of making changes to it without starting the main OS. If we flash the required archive through Recovery, we will get Root rights on our smartphone. This is what the menu looks like on Samsung phones:

In order to open Recovery on Samsung, you need to turn off the device and simultaneously hold down the Volume + + Power buttons.
In this case, you need to place the zip archive to receive Ruth in the internal folder file system or to a memory card, then reboot into Recovery and select “Install zip from sdcard”. After this, the process of flashing the archive will follow and, accordingly, after turning on the device, Ruth should appear.
Attention! Don’t flash anything like this! Otherwise, instead of Ruth, you will receive a brick that cannot be restored!

In Recovery mode there are a number of additional functions, among which:
- creating a backup copy of the firmware;
- reset device from full formatting all sections;
- clear cache;
- mounting partitions and much more.
Instead of standard Recovery (not available on all phones), you can install custom, more functional software. For example, TWRP Recovery.
Archive firmware from PC
In some cases, it is impossible to access the bootloader in recovery. For example, in Xiaomi phones, working with Boot Loader is not allowed by default and to access the section you must obtain official permission from Xiaomi. Only after this will you be able to bet anything. And this is done as follows:
An example of installing Recovery and Root is shown on the basis Xiaomi phone Redmi Note 4X. In other models, of course, everything may be different.
- Install the driver for your phone.
- Download the application for the official unlock and launch it. At the same time, turn off the phone, hold down the power button and Volume Down on it. As a result, the device will switch to FASBOOT mode. In this state we connect it to the PC.
- We accept the Mi Unlock license.

- We log in through an account that has been approved by Xiaomi.

- As a result, the phone will be detected and further connected.

- When everything is ready, click the button marked in the picture below.

- We will be warned in clear red letters about the irreparability of what we have done and the seriousness of the consequences of unblocking. They will also notify you that the device will become vulnerable to viruses. Have you changed your mind? So let's press.

- Next comes the unlocking process. First, the phone and account will be checked for permission from the creators. Then, if all is well, the bootloader will be unlocked.

- The process is complete. Click “Reboot phone”.

The phone will reboot and turn on with the bootloader unlocked. Now you can proceed directly to installing Root.
- We look for an archive with TWRP Recovery on the Internet and unpack it onto our PC. Next, we put the phone into firmware mode again (described above) and connect it to the computer. Let’s go to the archive with our Recovery and run “flash_and_boot.bat”.

- We wait until the files are flashed and, after the invitation, press any button. The phone will restart automatically.

- After we get into Recovery, we need to flash Root itself. Of course, there is no official website here, so look for the archive online. Initially, go to the “Installation” section.

- We find our Root rights file and select it.

- The firmware process will begin. We are waiting for its completion.

- We go up to the main menu and select the “Reboot” button.

- Tap on the “System” section. From here you can also go to EDL, bootloader, Recovery, unprotect menu, or simply turn off the phone.

You can also completely remove Root rights through TWRP Recovery. To do this, go to the “Advanced” section.
- Now let's check for Root rights again. Launch Root Checker.

- We press the familiar button.

- We grant permissions to the program to check Root rights. This is what we were talking about - all administrative actions are now controlled.

Voila! Everything works perfectly.

Using the example of the Chinese Xiaomi Redmi Note 4X, we installed Ruth rights. On other phones, everything may happen completely differently.
Conclusion
That's all. Now you know how to flash your Android smartphone and you can safely move on to the practical part of the task. If you're lucky, everything will work out just installing APK and a couple of taps on the screen. In other cases (as in the example with Xiaomi) you will have to get confused. But either way, you can root any Android, naturally, if you have the phone itself, theoretical information (given above) and the most important thing - direct hands.
Video instruction
if you have flagship smartphone HTC One and you want to get Root rights, as well as CWM recovery. Then the article Receiving Root HTC One + CWM Recovery is for you!
For those who have just become a beginner or are not an expert in the vast world of Android and are not familiar with the concept of how - Root Android , as well as why it is needed, what can be done after obtaining Root rights, or how to subsequently get rid of them if they are already necessary, you can find out from the article - root Android!
First of all!
There are no “left” links in this article or necessary actions! If you really need Root Rights, then read carefully and follow step by step, this is a guarantee that you will do everything right! Now let's start getting Root rights!
Before you get Root, you need to unlock the Bootloader of your smartphone - Unlock Bootloader HTC. Step by step
Required components and conditions for obtaining
- Battery charged at least 50%
- Downloaded and installed program Adb Run
- And also install drivers if they have been removed
- Download custom recovery
- Download update archive UPDATE-SuperSU.zip to obtain Root rights to HTC smartphone One (or if you don’t install an alternative update archive root.zip)
Instructions for obtaining Root HTC One
1. After you have unlocked the bootloader, go back to the Bootloader menu.

2. Launch Adb Run and go to Fastboot -> Reocvery menu
3. Move the recovery file to the menu that opens, close the window and press the Enter button
If you get a message on the command line:
fastboot
a) Perhaps you do not have the driver installed or you need to reinstall it
b) The smartphone is not in bootloader mode and you should reboot the smartphone again
5. Archive update UPDATE-SuperSU.zip move to phone memory
6. Install this update archive UPDATE-SuperSU.zip from the Recovery menu
8 Reboot your smartphone. Root rights obtained!
After receiving Root rights, you can start automating your Android using Tasker or removing ads from applications.
Second way
This method consists of installing the Kingo Root program on your computer - which will install Root rights to the smartphone
Any device with Android OS starts in Recovery mode. This is a standard feature. However, with the factory version you can perform too narrow a range of tasks. So, this is resetting the phone to its initial settings, clearing the cache, and also updating the system from the update.zip file. Obviously, users who are expanding their knowledge in the IT field are very dissatisfied with such a meager list. This is where specially developed Recovery Modes come to the rescue. CWM Recovery is a popular tool among Android users and a worthy replacement for the factory one.
Why do you need CWM Recovery mode?
Clockworkmod Recovery (CWM) is a famous alternative to factory recovery mode developed by Koushik Dutta. You can install it on most Android devices. CWM Recovery helps even in situations that sometimes seem hopeless to the average owner. That is why it is necessary to know about its existence, and also be able to use it.
 CWM mode has many options
What exactly does the utility do:
CWM: installation instructions
ClockworkMod is sewn into the internal memory of the device in place of the factory mode. In some cases, work is carried out on the gadget itself with access to Root rights, and in others - on a PC.
The article covers such basic methods as Rom Manager, FastBoot, Rashr and Odin. For many devices, companies themselves produce separate utilities, for example, Acer Recovery Installer for Acer devices. CWM is implemented into the device memory on these devices also through ADB software, which is suitable for devices manufactured by HTC.
Rom Manager: Rooting and embedding
Rom Manager is a utility created by the CWM developers. It is available for download on Google Play Market. Allows you to install CWM Recovery on the device itself without using a computer and a USB cable. Before using it, you must root the device, that is, obtain administrator rights.
Obtaining Root rights
The procedure is simple and can be easily carried out using special software. As an example, you can take the Framaroot program. Anyone can navigate its simple and intuitive interface, even without instructions.
 Click on the drop-down window
Select a method for obtaining Root rights. Follow the advice - restart the device for the changes to take effect.
 For the changes to take effect, restart the device
Launching Rom Manager
Now is the time to use the program:
 Select Recovery Setup
 Click on ClockworkMod Recovery to install
Video: how to flash Recovery with Rom Manager
Although the method is easy, it has a drawback: it is not suitable for all devices, as mentioned earlier. Before you start using this method, it would be logical to first determine that this program is compatible with the gadget. The list is available on the official Rom Manager website.
FastBoot Mode: Complex Method
Installation method CWM with using FastBoot will require skill from the user, since it is much more complex than the previous one. It runs not on the device, but on the computer. It is recommended to use it only if you already have skills in such operations. Before installation, you need to download certain files to your computer or laptop. This list also includes the Android SDK platform, available for Windows, Mac and Linux.
Preparatory stage
What you need to have before installing CWM using FastBoot mode:
The Android SDK utility will help you install the necessary Android SDK Tools and Android SDK Platform tools packages:
 Download the Anroid SDK zip archive for Windows from the official website
 Find android file in the unzipped folder and open
Check the box to the left of Android SDK Platform-tools and click Install 1 package.
 Select Android SDK Platform-tools and click Install package
 Accept the license agreement
 The fastboot and adb files are located in the tools_version-windows folder after installing the Android SDK Platform-tools package
What else needs to be done before starting the firmware itself? Judging by the list above, you need the recovery-clockwork.img file. This is one of the key tools for further work. Downloading it won't be difficult, but it doesn't end there. It is important to place this file in the platform-tools folder. For further convenience in the firmware, you need to rename it to recovery.img.
 Place the file in the platform-tools folder
Get straight to the point!
Now everything is ready for the CWM firmware itself, so you can safely get to work. Given below detailed description action in which it is quite difficult to get lost.
 Start your device in FastBoot mode
 To open command line, go to Start and enter cmd
 Type cd / and press Enter
 Enter the command with the path to the folder
 The adb devices command will help determine whether the PC sees the device
The level of complexity, as you can see, is high, so before the procedure it is strongly recommended to check that this method is suitable for the device, since it may not work in all gadgets.
In practice, this method is good if the manufacturer of the device is HTC.
Rashr app The installation method using Rashr is convenient and easy to perform; it is recommended for beginners. However, ironically, it also requires administrator rights. You can get them in a few steps. detailed instructions
was given earlier in the section on Rom Manager.
How to work with Rashr First you need to download the application itself. It is located in free access
in Play Market (Rashr - Flash Tool). You can also view the program on a third-party site, but you must beware of suspicious web pages so as not to catch a virus.
 Select CWM Recovery.
 The software will provide available versions of Recovery for the given device being flashed, such as the touch ClockworkMod and the option with key control.
 and click Yes to confirm the download.
 After downloading, a notification will pop up that the new recovery has been successfully downloaded and installed. To go there, click Yes.
To go to Recovery, click Yes
Odin: solution for Samsung
The previous three methods are suitable for different models devices. The same method is effective for Samsung devices. This is a proprietary utility, so it cannot be used for devices from other manufacturers. There are many versions of this application. The latest one is Odin 3.09.
Here the standard factory version of Recovery is changed to a modified one using a PC, as with FastBoot:
 Download the Odin program on PC
- power/lock button and volume down (on older devices released before mid-2011);
- power/lock button, Home and volume down (all other devices).
 Click the Start button and wait for the firmware to finish
How to enable CWM Recovery mode after flashing
Once CWM mode has been installed using one of the above methods, you need to check if it works. You can launch ClockworkMod Recovery:
Possible difficulties
During the installation of an alternative Recovery Mode, in particular CWM, various difficulties and errors may arise. Which of them are the most common and how to solve them?
CWM Recovery does not recognize the memory card
CWM makes it possible to update your phone using an archive. When opening Recovery, the user sees a message that the flash card cannot be mounted. After installing another card, even with less memory, the problem disappears. The reason lies in the Windows system. The fact is that it diverges from card formatting standards. To ensure formatting is performed in accordance with the specification of SD/SDHC/SDXC flash cards, and not just in standard form, it is recommended to use specialized software, for example, SD Formatter.
 The SD Formatter program allows you to correctly format the SD card
 CWM does not see the internal memory of the device: problem solution
When the files to be recovered are on internal memory, and therefore can only be restored from there, a problem may arise. When connected USB cable to the PC and enable “USB Debugging”, the program reports that Android device not detected and you need to enable “USB Debugging”.
To solve this problem:
Recovery menu doesn't work
If when you launch the alternative recovery mode (volume + Home button or power) a picture appears with a lying robot, then the recovery was flashed, but when you restarted the device it was overwritten by the stock Recovery.
The problem is solved as follows.
Flashing a new Recovery mode means acquiring new functionality. Firmware methods vary in complexity, but ironically, the simplest of them require access to Root, that is, device administrator rights. When choosing a firmware method, you need to be guided by the phone model first. Rom Manager is not suitable for all devices. For HTC, the FastBoot method is more suitable, while for Samsung it would be more correct to choose Odin.
An article about how to get root on Android devices, why you need root and what the consequences of rooting may be.
All Windows users They are accustomed to the fact that, for the most part, they are full-fledged masters of their computer. You can install almost any programs and games (limitations only in hardware and OS version), fine-tune the system or modify it...
After the first acquaintance with a touch Android device, many Windows users experience some confusion :) It turns out that Android by default has quite a lot of different restrictions, and in order to remove them, sometimes you need to “shovel” quite a lot of information on the Internet.
When I got my smartphone Samsung Galaxy Two things immediately bothered me about him. The first is the very small amount of memory allocated for applications (only more than 100 megabytes). The second drawback was the presence of a whole bunch of third-party and unnecessary software for me personally, which could not just be taken and deleted (clients for Odnoklassniki, Facebook and others like them).
In order to solve the problem with space, it was decided to find a way to remove pre-installed applications. After searching the Internet for various tips, I came to the conclusion that to do this I need to root my smartphone. Actually, we will talk about this procedure, which frightens many beginners, in our article.
What is root and why is it needed?
IN operating systems Linux-based (which includes Android) has quite a lot of options in terms of settings. One of them is the strict delimitation of rights to access separate files or entire directories and functions. Windows also has such capabilities (editing file attributes and changing accounts), however, most often we do not use them, working on a computer with a single account - Administrator.
Roughly speaking, an analogue of this account in Linux is the Superuser mode or simply “root” (English root - root). The superuser account on UNIX-like systems has a default login of "root" and a UID of zero.
Having root rights, you can perform any actions in the OS. However, this is where the main catch lies. If you don’t know the system’s operating features well enough, then with active ROOT you can easily ruin it by deleting or renaming just one file. And, if you consider that a virus or another user who has gained access to your device can do this for you, then the risks increase significantly!
It is based on this logic that most manufacturers of modern Android devices do not give the user root rights. Moreover, if you ROOT, you will lose the warranty on your device! Another side effect of rooting is that you will not be able to receive system updates from the Internet. Well, in the most advanced cases, trying to get root can render your device unusable.
Looking ahead a little, I want to say right away that for many smartphones and tablets the rooting procedure can be reversed :) That is, if necessary, we can block the superuser account again and there will be no traces of root left in the system.
Now let's see what we can get by unlocking superuser rights:
- the ability to install any applications;
- the ability to edit and modify any system files;
- the ability to remove any pre-installed programs;
- the ability to install third-party custom firmware and mods;
- opportunity fine tuning system by enabling/disabling various additional functions (for example, SWAP activation).
As you can see, obtaining superuser rights is a procedure for more advanced users who understand at least a little about the intricacies of their system and want to improve something in it. If you use your device only for calls and surfing the Internet, then you essentially don’t need root :)
Rooting options
- Usually, obtaining superuser rights means full root. This type of rooting is retained in the device after numerous reboots and provides full access to all system directories and files. A sign of successful completion of rooting the device in this case will be the appearance of the SuperSU or Superuser application for visual control rights and requests from other applications.
- Temporary root. This type Rooting involves obtaining superuser rights for a period of time until a reboot. Useful for one-time tasks such as deleting unnecessary applications or installing some tweak. This kind of rooting does not install anything and does not leave any traces after rebooting the device. Unfortunately, it is not supported on all devices.
- Shell root. This type of rooting allows you to obtain permanent superuser rights, but differs from full root in that it retains system folder(/system) blocked. Just like Temporary Root, you can’t get it on all devices.
Typically, your device may have root rights initially, so before you start “dancing with a tambourine,” you can check this. Go to Google.Play and search for the phrase “Root Checker” or follow the direct link and install the application of the same name. Launch it and click on the very top line with the name of your device. After a couple of seconds the program will give a verdict):

As you can see, we don’t have superuser rights now (I unrooted the phone in advance for the purity of the experiment :)). Therefore, now that we know all the theory, it’s time to move on to practice. You can get root on Android in two ways: directly from the device itself using the application and by connecting to a PC via a USB cable. Let's consider each of the methods.
Applications for obtaining root rights
Just a couple of years ago, in order to get root on a smartphone or tablet, you first had to find a driver for it, then find a rooting program, configure it, and only then try to get superuser rights. And it didn’t always work out and not the first time.
Today, the above algorithm remains valid only for outdated and Chinese devices. Getting root for most modern and popular Android devices is just a matter of a couple of clicks! Moreover, you don’t even need to connect anything somewhere. You just need to install the application on your device and activate it.
I bring to your attention several similar applications. Since they are designed for modern devices, not all of them worked on my Samsung Galaxy Y, but nevertheless, thanks to one of them, I managed to get root :) So...
- official site .
This application is one of the most popular on various forums and it is almost in the forefront of advice to try to obtain root rights to modern devices. The application's capabilities include choosing the root manager to install (Superuser or SuperSU), several rooting algorithms for different devices, and the function of removing superuser rights (unroot).
Unfortunately, the application refused to work on my phone. Therefore, to avoid getting into the same situation, first check whether your device is in the list of supported devices on the official website.
z4root- official site .
This tool is also recommended on numerous forums. Like Framaroot, it allows you to obtain and reset root rights in one click. But in addition to a full root, it can also produce a temporary one, which adds advantages to it! However, on my smartphone this application did not start at all and crashed with an error, so, unfortunately, I cannot say anything more about it than is available on the forum at the link above.
Un-Rooting- latest version of the APK file (Un-Rooting 2.1).
Another craft on the topic of rooting without a PC. The name shows that the application is primarily focused on revoking superuser rights. However, as it turned out, it can give these rights. By the way, this is the only application that gave me root on the Samsung Galaxy Y! But first things first.
When I found it on Google.Play, I thought it was pretty dubious. This was facilitated by screenshots only in Chinese and a score of 3.2 points. Moreover, most of the ratings were either “5” or “1” :) But, nevertheless, I decided. After launch, a screen appeared in English with only three sections:

The first section contains a link to reference materials, which, in fact, are not needed. The latter allows you to write a letter to the developer. But the middle one is just what we need. There are two buttons here: “Un-Rooting”, which will be active if you have root rights and will allow you to remove them, as well as “Re-Routing”. The latter presupposes the activation of superuser mode. Click it and confirm all requests.
After successfully completing the installation of the root and the Superuser application, the latter will ask us to provide superuser rights for our Un-Rooting. We allow access and see that now the “Re-Routing” item has become inactive, and instead the first one has been enabled, which allows you to remove the root if necessary:

In addition to the applications mentioned above, you can find a number of others. Perhaps one of them will suit you. Therefore, if you were unable to root your device using the programs described above, I recommend entering a query like “application for obtaining root rights for (name of your device)” in a search engine. Perhaps you will find something useful specifically in your case.
Thus, summarizing our experience, we can say that the advantage of obtaining root rights using applications is that they cannot, in principle, lead to breakdown of the device and do not require rebooting it. That is, we can enable and disable superuser rights directly “on the fly,” which is convenient in some cases when we do not need root for good.
However, not all devices can be rooted this way. Therefore, below we will consider the traditional rooting algorithm.
Getting root using a PC
As mentioned above, this method of obtaining superuser rights is one of the oldest. It involves uploading a special exploit (script) to your device, which installs the executable file “su” and a number of utilities in the /system folder, such as the already familiar Superuser and SuperSu root managers, as well as, optionally, the BusyBox terminal application.
There are quite a lot of programs that allow you to get root on Android using a PC, but among the free ones, I would recommend using Kingo ROOT. This utility has a fairly large database of popular models of smart devices, automatically downloads drivers to work with your device and can both grant superuser rights and revoke them (that is, unroot).
First, download the program from the official website or from our archive and install it. After installation, the program window will open in connection standby mode:

To make the connection happen on your device, go to "Settings" - "Applications" - "Development" (or in new versions of "Settings" - "For Developers") and activate the option there " USB Debugging". Now you can connect the device to your computer using a USB cable. If the program Kingo ROOT recognizes your device, it will begin to download the driver for it, which will notify you:

When the driver is installed, the main working window will appear, which will display the current status of root rights and two buttons that allow you to remove the root or reinstall it:

Actually, to obtain superuser rights, you need to press the right button “Root” or “Root Again” (if you already have root rights, but they don’t work as they should). This is where your actions end :) All you have to do is wait until Kingo ROOT copies everything to your device necessary files and will trigger it to reboot.
After the reboot, the root will be ready. This will be clear from the fact that a new one will appear in the list of applications - SuperSu. There will also be another application called Kingo ROOT. This is a utility through which the computer sent commands during rooting. It can be deleted if you do not plan to roll back the root (although even if you delete it, it will reappear when you reconnect to the PC via Kingo ROOT).
If you are the owner of a smartphone originally from China, then there is a specialized utility for such devices - VRoot. Its latest version (which you will find in the archive) has finally begun to support English language, so it won’t be difficult to figure out what’s what (if it’s possible to get root, there will be just one button).
Except Chinese phones and tablets, VRoot also works with most popular branded models (its database includes more than 8,000 devices). However, I would advise resorting to using this utility only when other methods have not worked. The problem is that VRoot installs, along with superuser rights, a number of third party utilities in Chinese (they can, in principle, be removed), as well as the non-standard Chinese root manager KingRoot.
You can replace it with a normal Superuser or SuperSu only manually through some file manager. To do this you will need to do the following:
- Download SuperSu and rename the APK file to Superuser.apk.
- Upload the resulting file to the device’s memory card.
- With help file manager replace the file in the /system/apk folder with this file.
In principle, the described actions are not difficult to perform, but these are all unnecessary movements that might not have been needed if we had used one of the simpler solutions.
Route through recovery
The last way to get root (if all the previous ones did not work) can be to obtain superuser rights using the built-in device recovery system (in common parlance - recovery).
Here, alas, there is no universal method. You will have to re-read popular forums specifically for your device model and, most likely, somewhere in the depths of the discussions (or in the header, as on w3bsit3-dns.com) you will find several archives with names such as recovery.zip, root.zip, superuser .zip or something like that. The following is the algorithm:
- The archive that is suitable specifically for your device must be downloaded to the device’s flash card, to its root (/sd directory).
- Turn off the device and turn it on in recovery mode (usually where you download the archive from, it is written how to do this in your device model). For Samsung Galaxy Y, for example, starting in recovery mode is done with the central button and the volume up key pressed.
- Select the Aplly Update From SDCard menu and run our archive for execution.
- Wait until all files are copied and the device reboots.
An indicator of successful receipt of root will be, as in all previous cases, the appearance of a root manager (Superuser or SuperSU).
conclusions
In the article, we tried to consider all the options for obtaining root rights on Android devices. The only unaccounted way that has not been mentioned is to completely flash the device to alternative firmware, in which there is a root initially. However, this is a rather radical measure.
I think that after reading the article, you will understand that root is not as terrible as it is painted :) Obtaining superuser rights for Android today has become quite simple and safe. And most importantly, it’s free;) The archive for this article will help you with this, in which we have collected all the applications and programs mentioned.
If you want to gain full control over your device, in most cases you can do it yourself without any Herculean efforts. However, first think and name at least three reasons why you needed root;) Did you name them? Then I wish you success!
P.S. Permission granted to freely copy and quote. this article provided that an open active link to the source is indicated and the authorship of Ruslan Tertyshny is preserved.
 Order 343 mail. Order by Russian post. Consequences of failure to appear in court when summoned
 How to put a password on a folder on a Windows computer without and with programs
 Pluton – Free Bootstrap HTML5 One Page Template
 History of ZX Spectrum: Myths and reality New Spectrum
 Voice assistant Siri from Apple Siri functions on iPhone 6s
 How to roll back to a previous version of iOS?
 Unlock iPad in four days